GrandWillys Project

That looks great. My cab only has one in the center and it's screwed in. And missing at the moment. I would bet this is 400% stronger that mine!

My early cab had three screwed in for the bottom half, with the two outers supporting the seat back, and two that screwed into the window frame in the upper. They had a type of dense block behind them to support the wall and help against the squeaks at one point. :)
 
Back from holidays after seeing Christmas and the rest of the year out while camping by a river in the bush. Nice way to spend the hot summers days away from the hustle and bustle.
Been hard in the workshop since back though with it being 38*C/100*F inside!


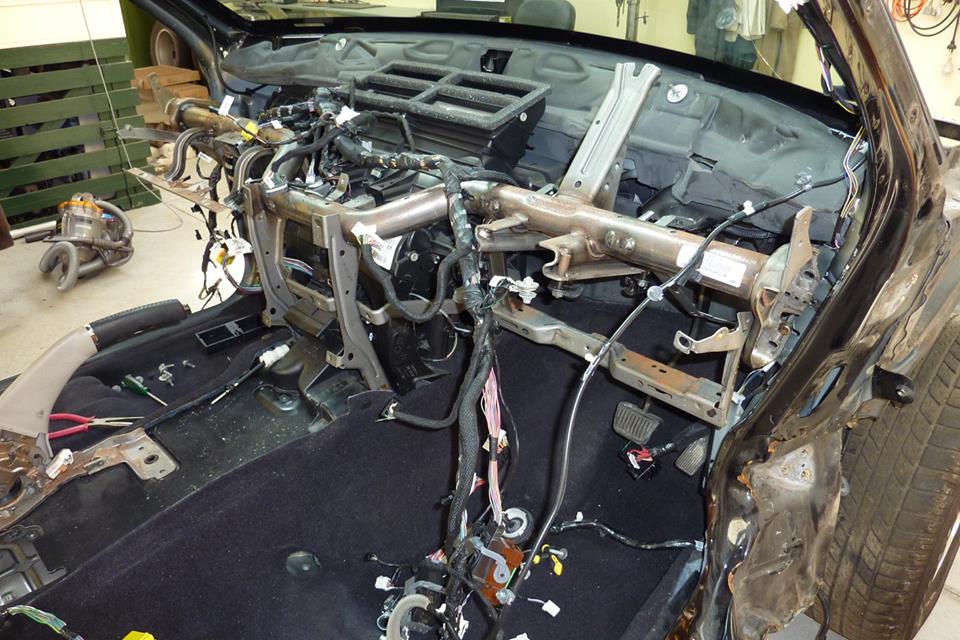
Willys974.jpg

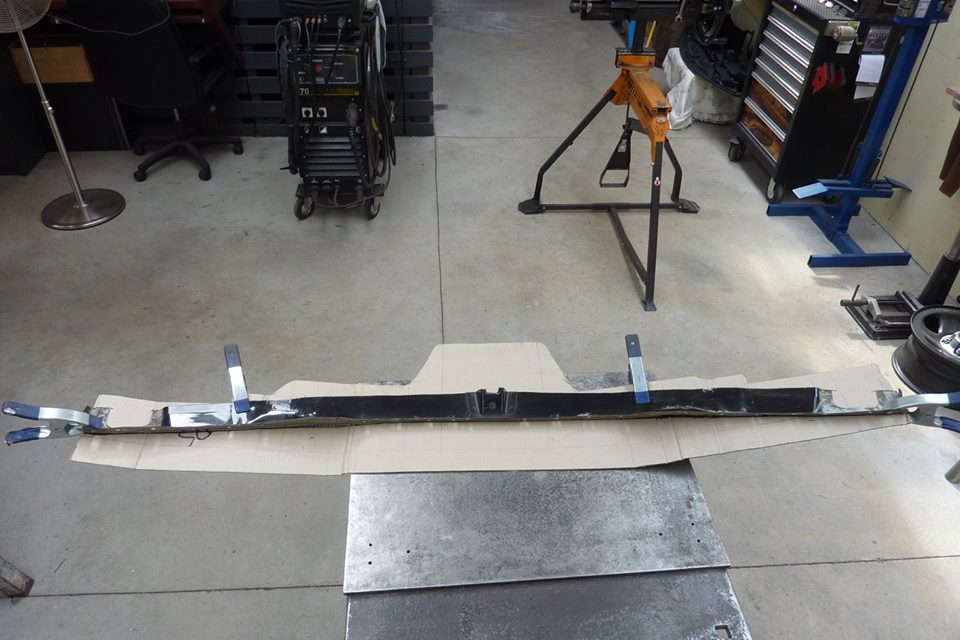
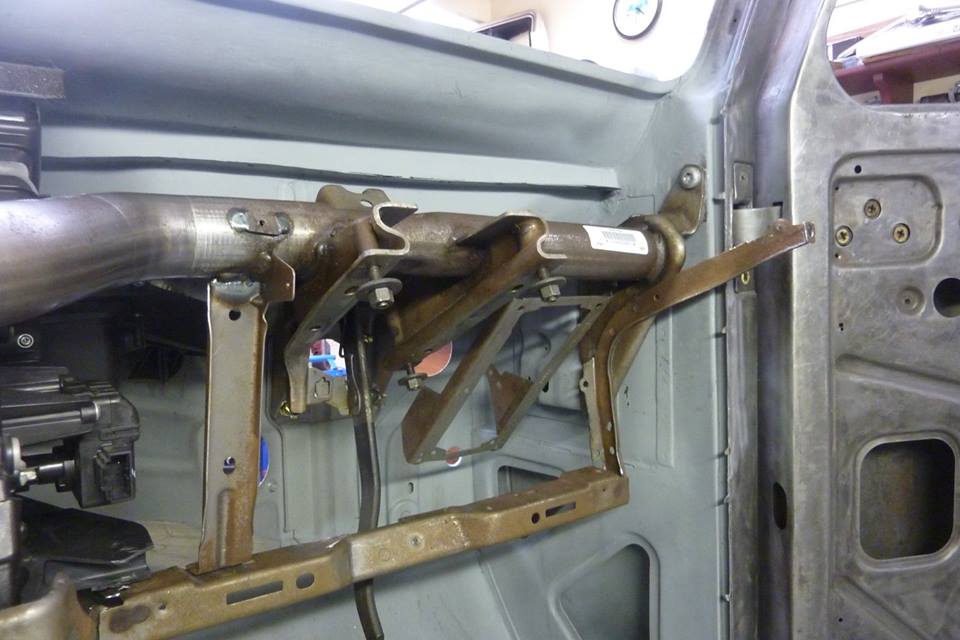
As I will be using as much from the interior as possible from the donor, I will be adding this support frame that goes from A pillar to A pillar. It took some of the impact from the Harley hitting it side on at 100mph, so needed some straightening first on the end bracket and lower frame.


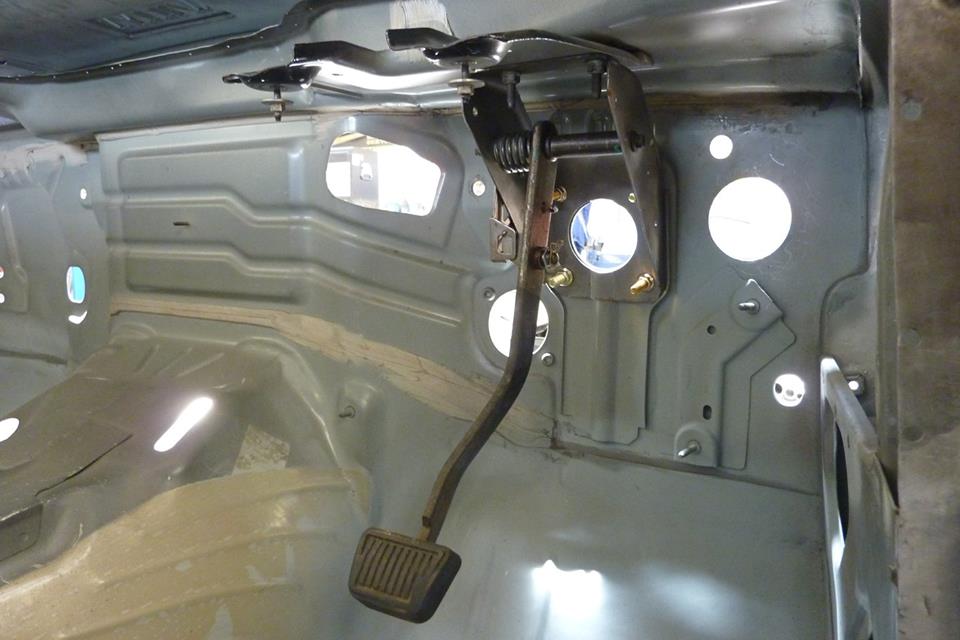
Willys975.jpg

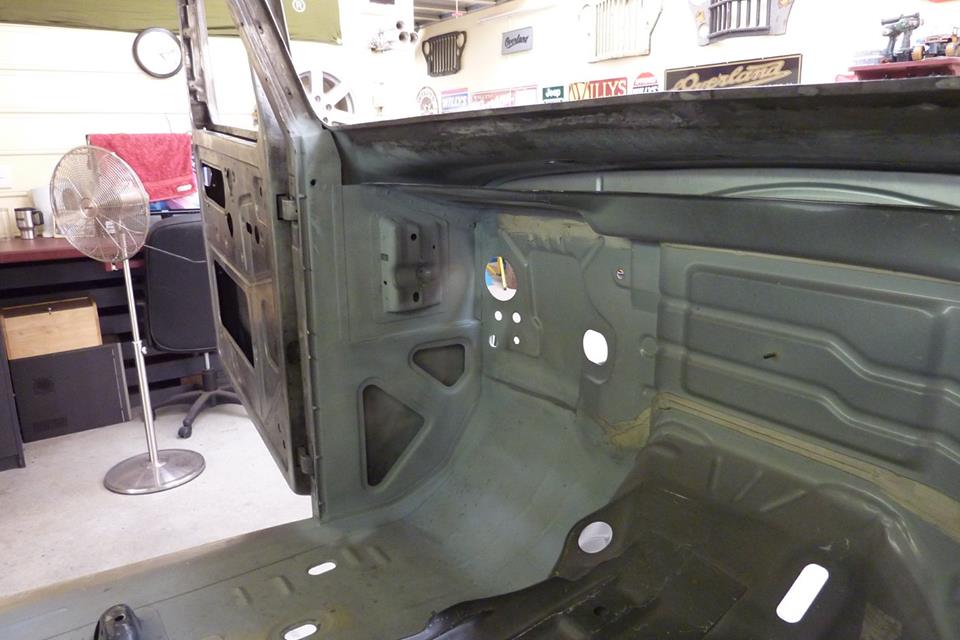
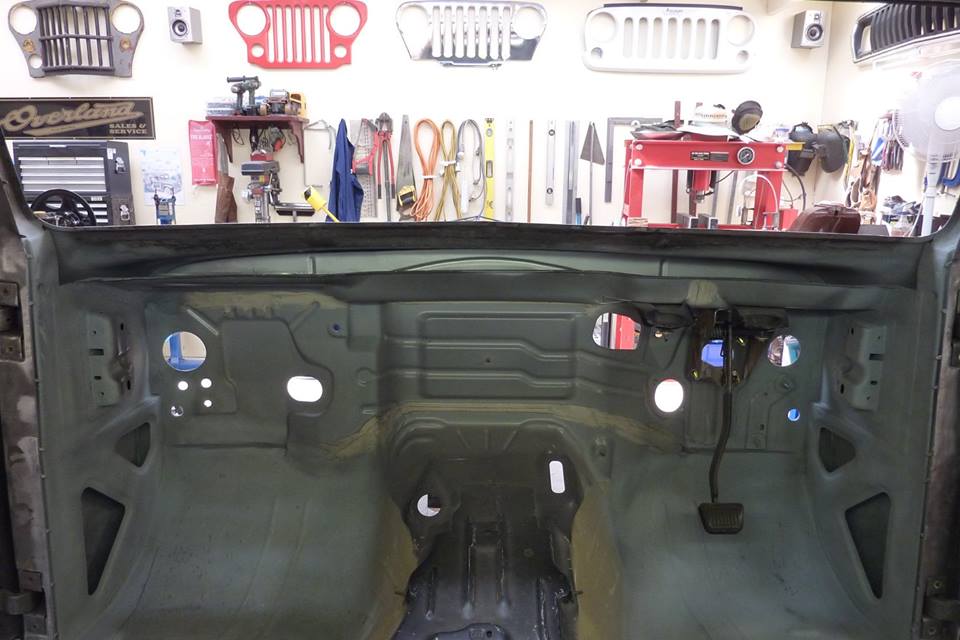
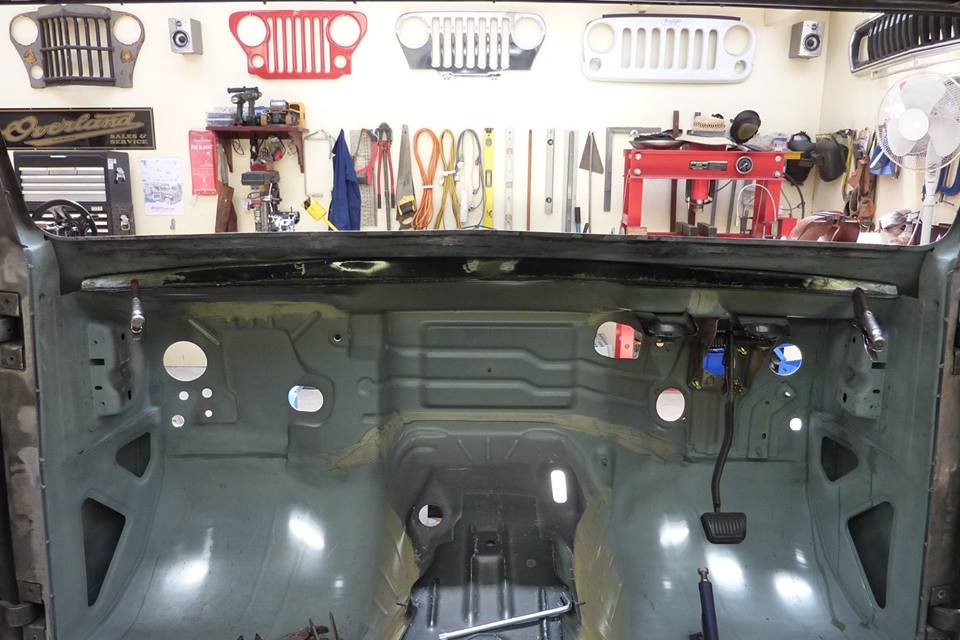
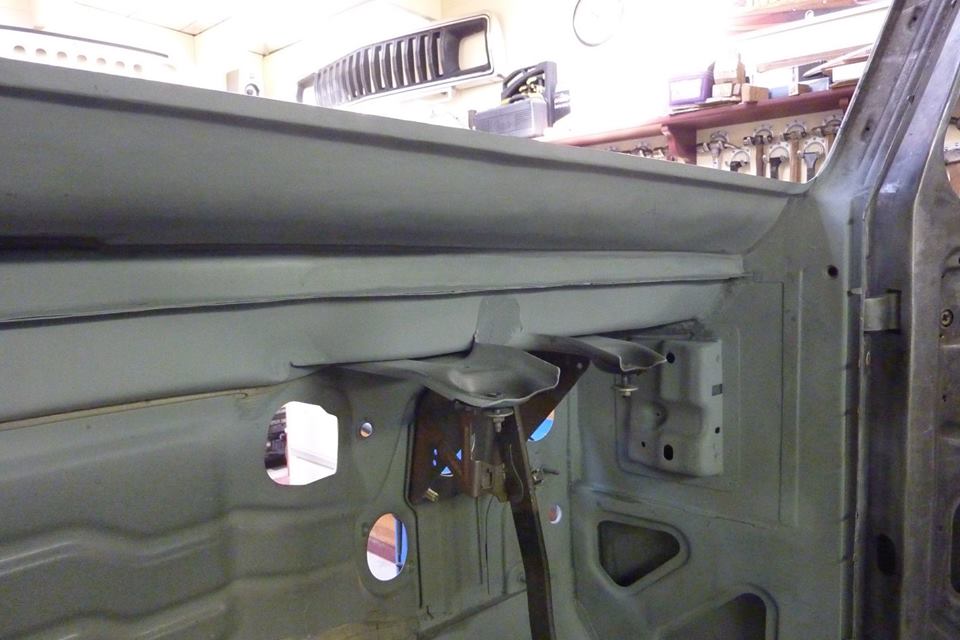
I fitted the brake pedal as it bolts between the firewall and the lower cowl as I wanted that to be at the correct height. Can also see the two studs that the support frame I am adding next bolts to.


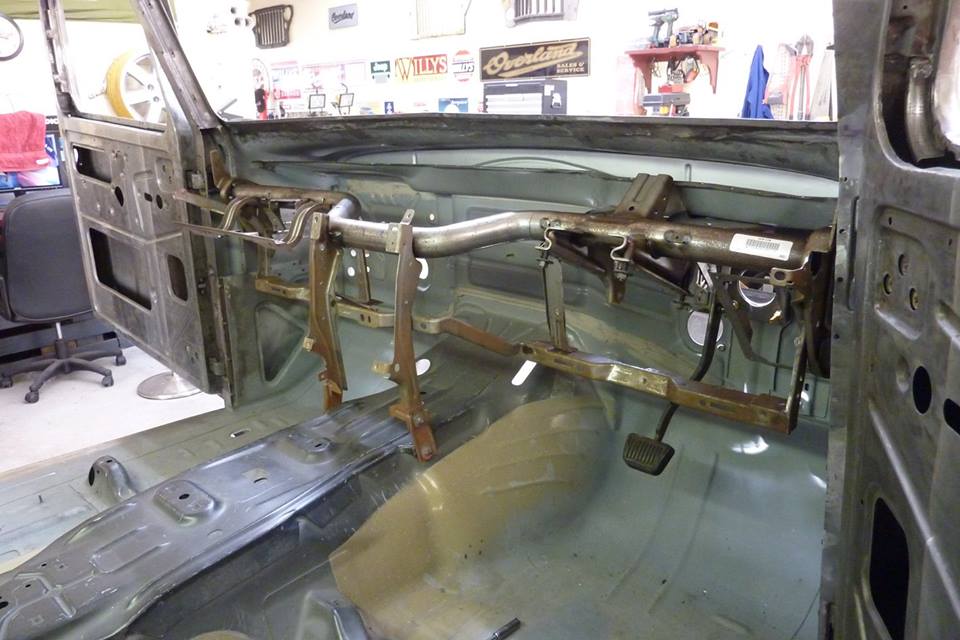
Willys976.jpg

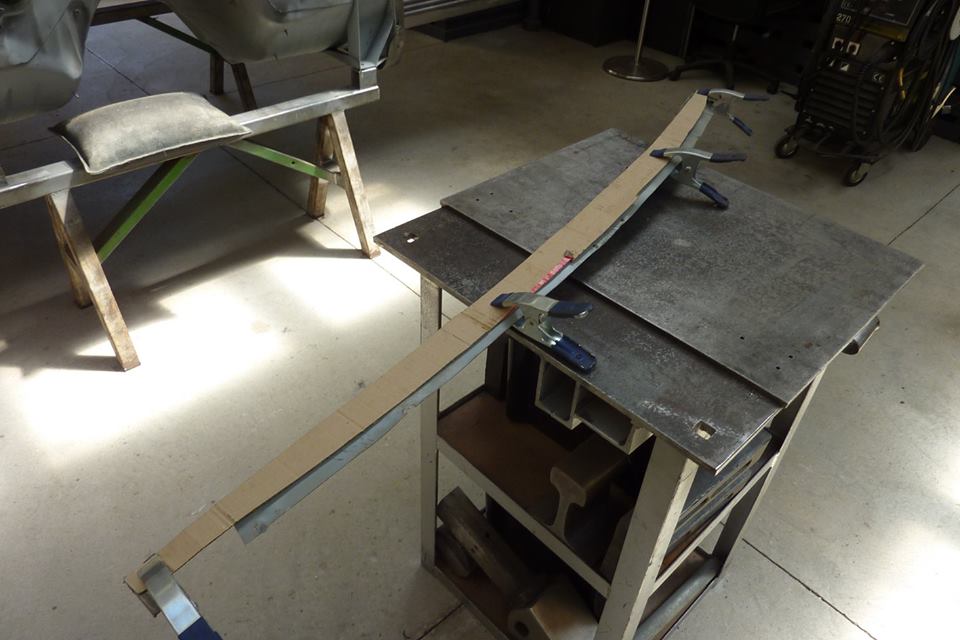
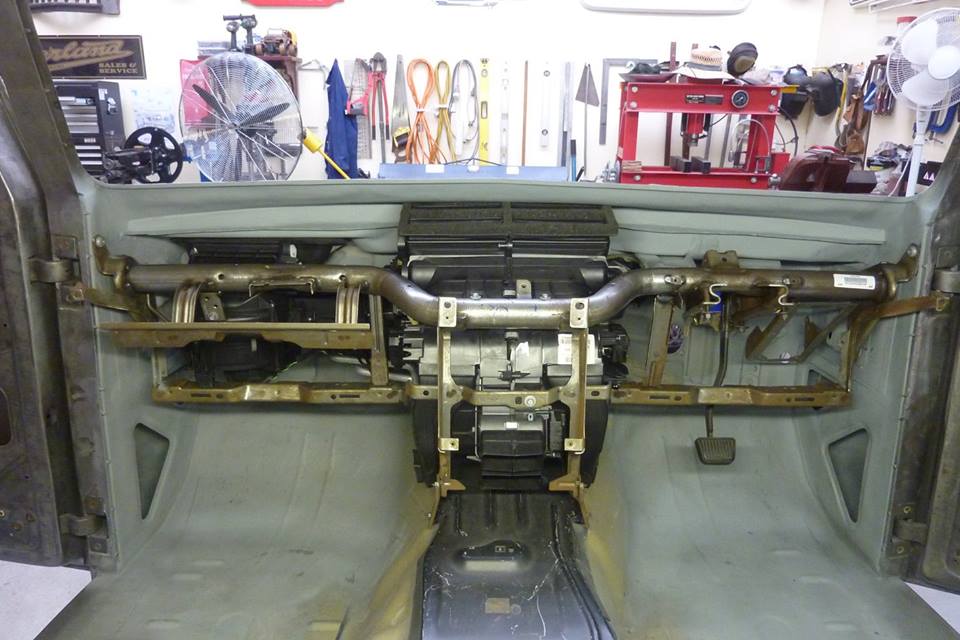
After straightening the frame I could bolt it into the lower cowl and also the studs on the transmission hump. The tube is very strong and did not bend in the impact. It is 52x5mm-2"x5/16" mandrel bent tubing. The frame holds the steering column, satnav, climate controlled air-conditioning, glove and fuse box etc.


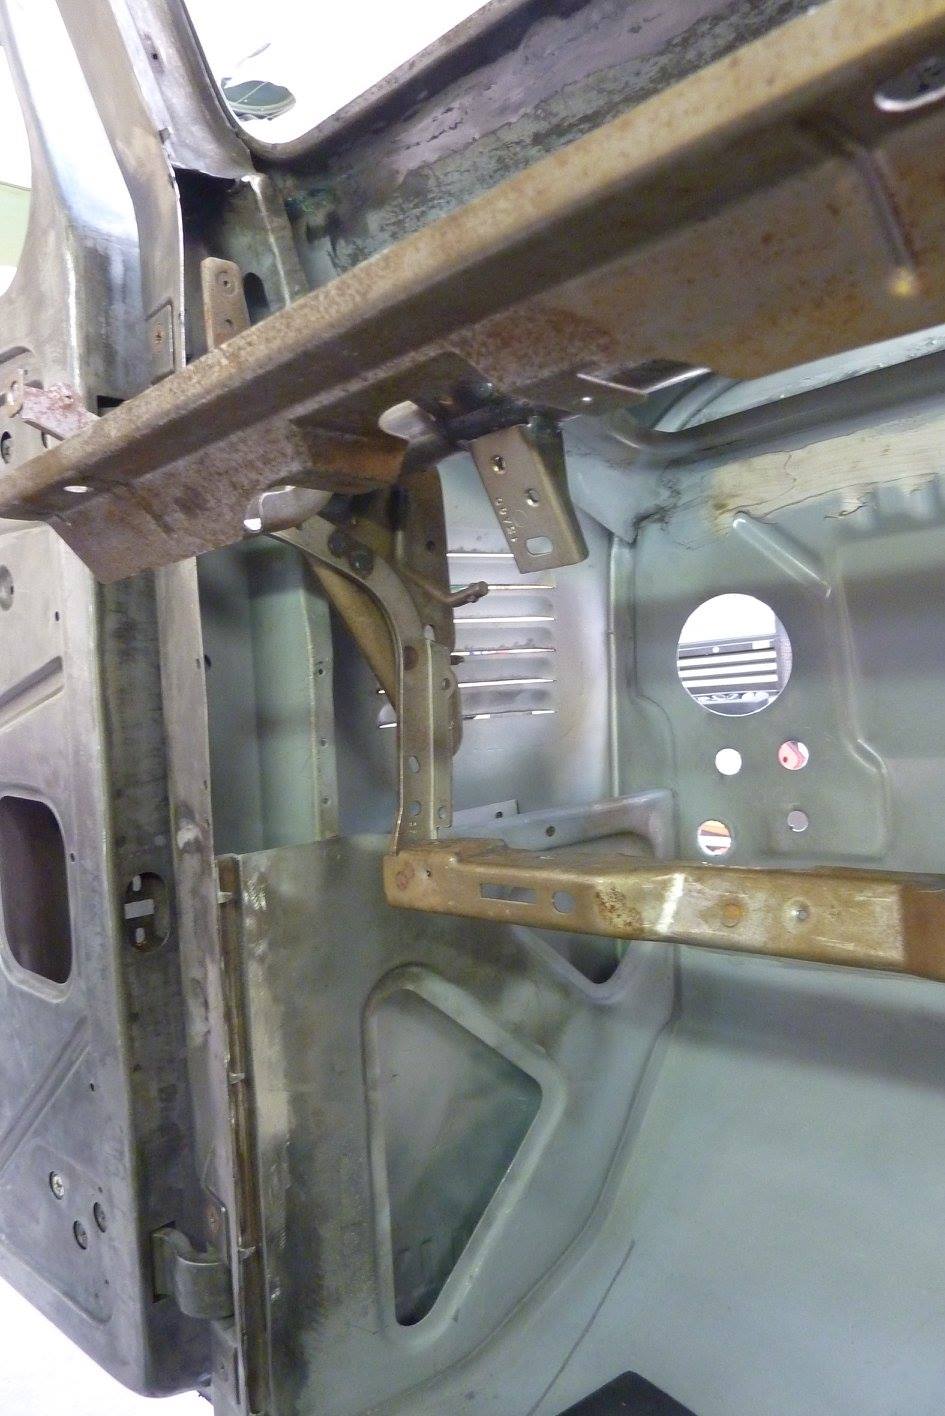
Willys977.jpg

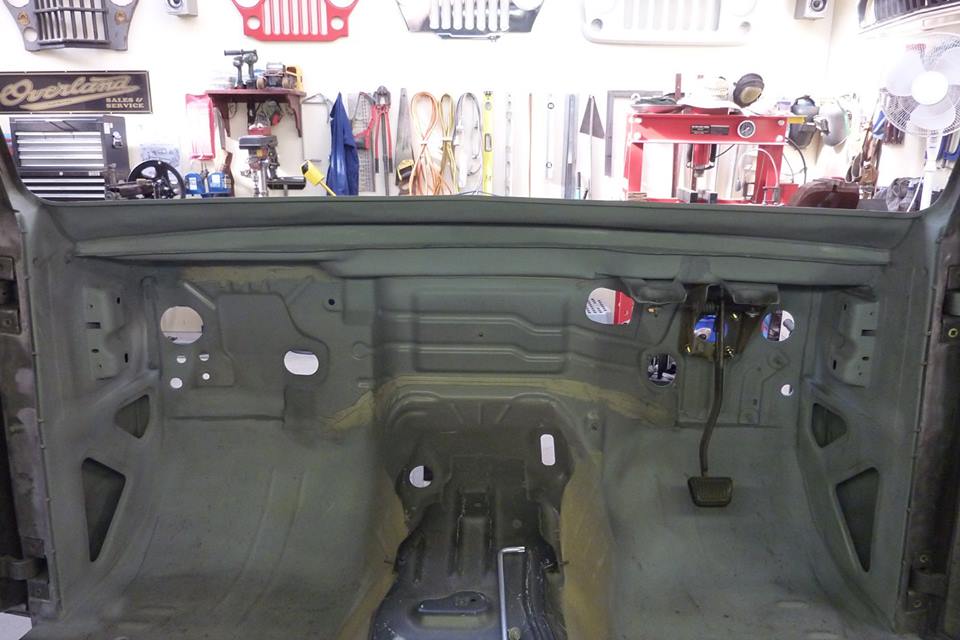
Can just make out the vertical face of the main mount for the frame over by the louvers. I will have to add something to stretch from the A pillar right to the firewall. Going to utilise the tag that is in the middle of the A pillar as well for an extra mount.


Willys978.jpg

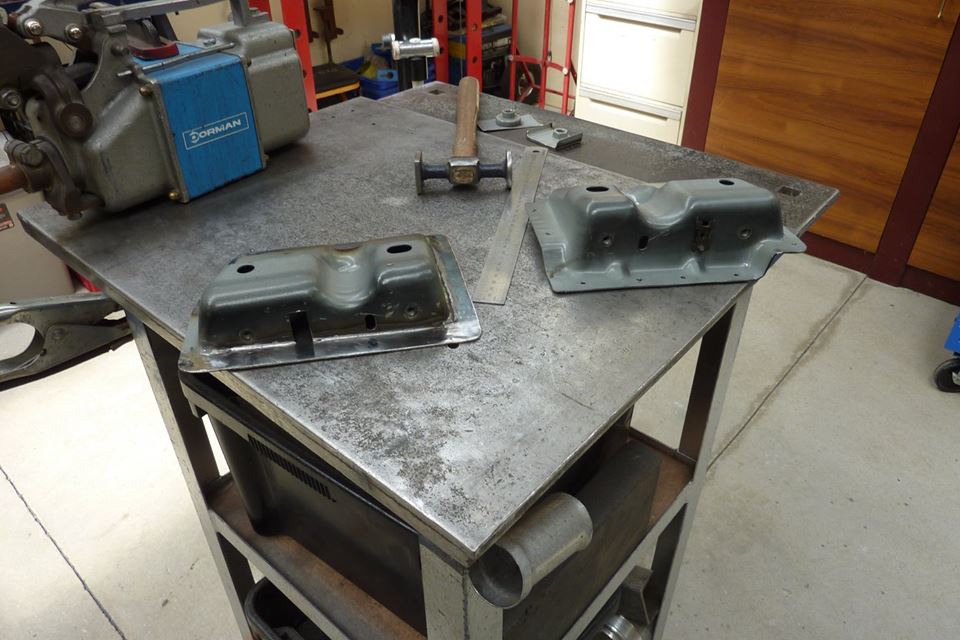
I had kept the original donor mounts for this purpose but have to modify them to suit my setup. Can see the stock one on the right and how I have altered the other one.


Willys979.jpg

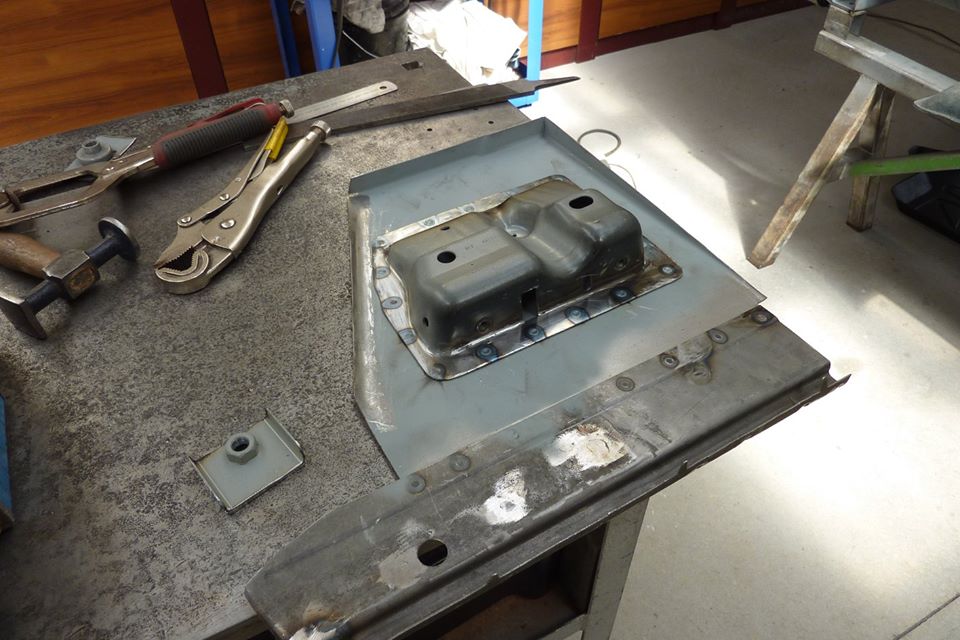
I have bent up a new upper panel out of 1.2mm-18g sheet to take the mount. Spot welded it to the original A pillar piece from the Willys. Decided to add an extra mount also for the frame and the captive nut will get welded behind the hole which will be inside the A pillar itself.


Willys980.jpg

This adds a lot of strength to the A pillar to take the weight of the longer doors I have. The panel is plug welded to both sides of the A pillar and also to the firewall and lower cowl and kick panel.


Willys981.jpg

Both sides now done. Next will be to make a filler panel between the lower cowl and the upper one as all has to be sealed off for my fresh air intake which draws fresh air in from the louvers I cut into both cowl sides.


Willys982.jpg

I had only this piece left from the donor cowl that attached to the lower and think it will be just enough. I traced its outline onto some cardboard so I would have somewhere to start.


Willys983.jpg

My CAD, cardboard aided design, will give me a line on which to tip a flange across the top under the Willys cowl.


Willys984.jpg

It is getting there. That thick white sealant is not my work BTW. It is factory Jeep work from 2008!


Willys985.jpg

The piece has now been spot welded again to the lower cowl and glued with panel adhesive to the underside of the Willys cowl.


Willys986.jpg

The ends have also had patches shaped and welded into the new piece of the cowl and the A pillar.
 
Last edited:
you set your break pedal on the wrong side, you may want to fix that before you get to far along...

nice work as always.
 
I guess everything is backwards down there from what we're used to! Steering wheels and weather specifically. Just think, it was literally 125 degrees Fahrenheit COLDER here last week!! We had -25 for a couple days. I love to ice fish, but I'm over it at this point.

I'm sure I speak for many others when I say the interior fitment will be VERY EXCITING to watch. We've all thought about it, but I don't have the skills myself. Carry on!

Here where I live you would be lucky to get below 25*F more than 1/2 dozen times a year. I have been in pretty cold situations like what you just had but was while climbing to Mt Everest Base Camp in the middle of winter and that was inside our room! No heating provided. Mind you it got that cold in the summer when we went to Antarctica as well.
 
As usual Marcus great work! Happy to see some progress!
 
Last edited:
Willys987.jpg

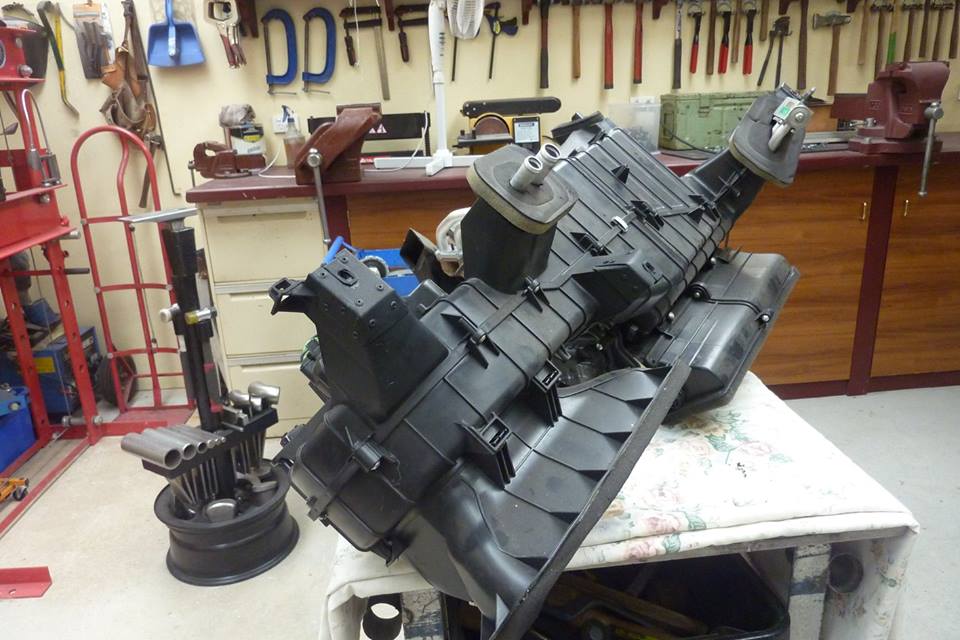
The heater-A/C unit took some damage in the accident. It is attached to both the firewall, in three points, as well as the inner frame in 4 places. The side impact moved the frame and broke all the firewall mounts and one on the frame itself. I made inner and outer sheet metal reinforcements that were riveted on, sandwiching the original plastic in between.


Willys988.jpg

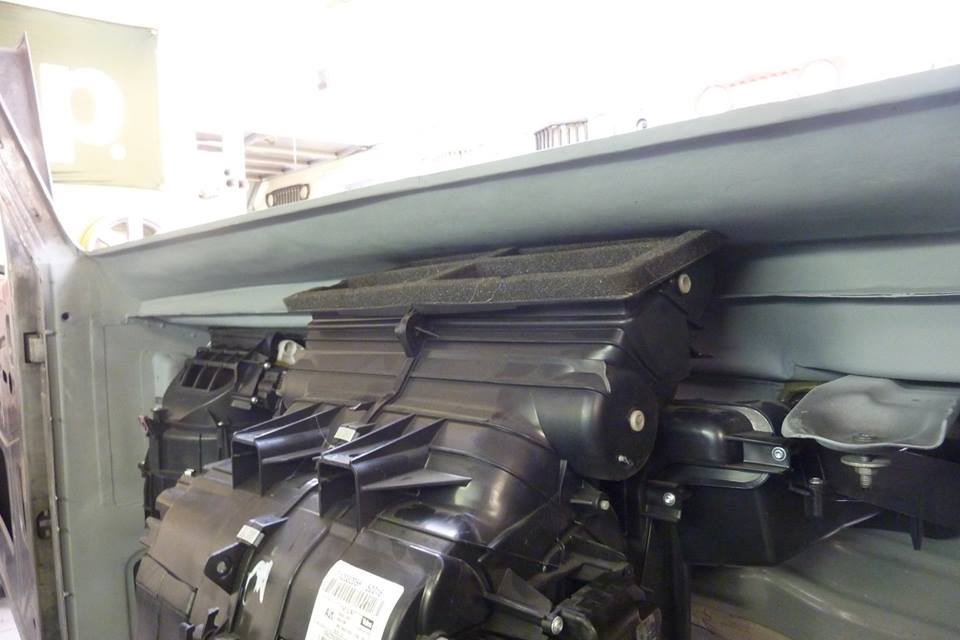
The unit only just clears the cowl which will make the ducting a bit difficult.


Willys989.jpg

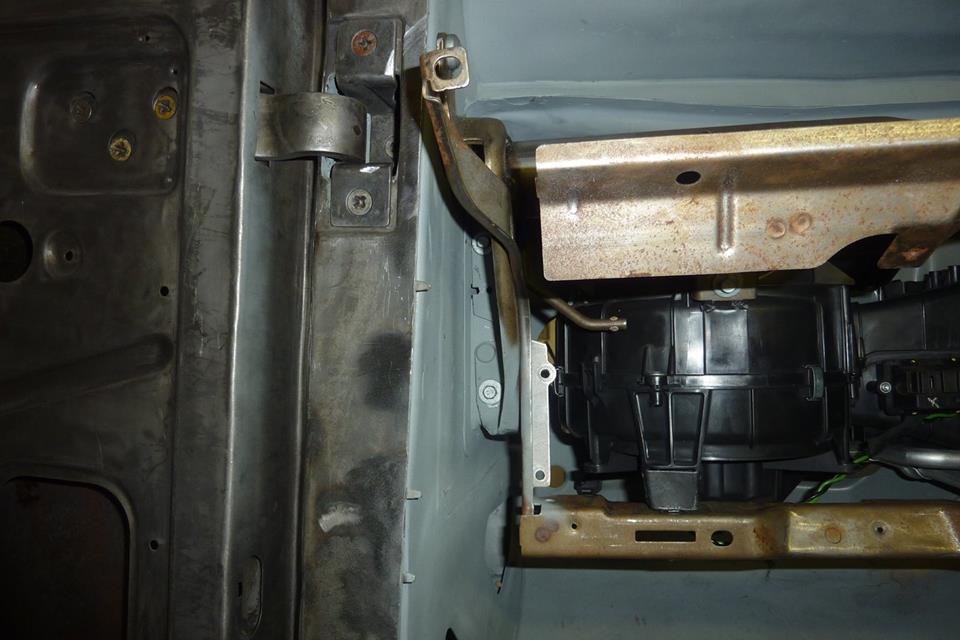
Can now see how the frame bolts into the new mounts I made above the kick panels.


Willys990.jpg

Also the extra ones into the A pillars. They brace the pillars left to right very well now.


Willys991.jpg

All original mounts are used between the firewall, and the frame for the heater-A/C unit and the frame to the lower cowl, upper kick panels, transmission hump and the extras in the A pillars!


Willys992.jpg

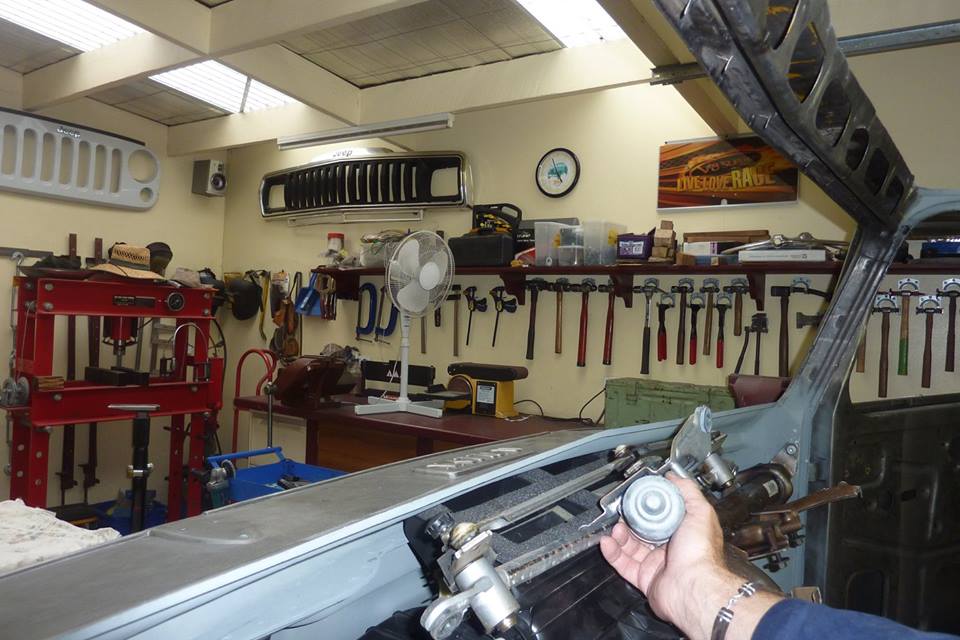
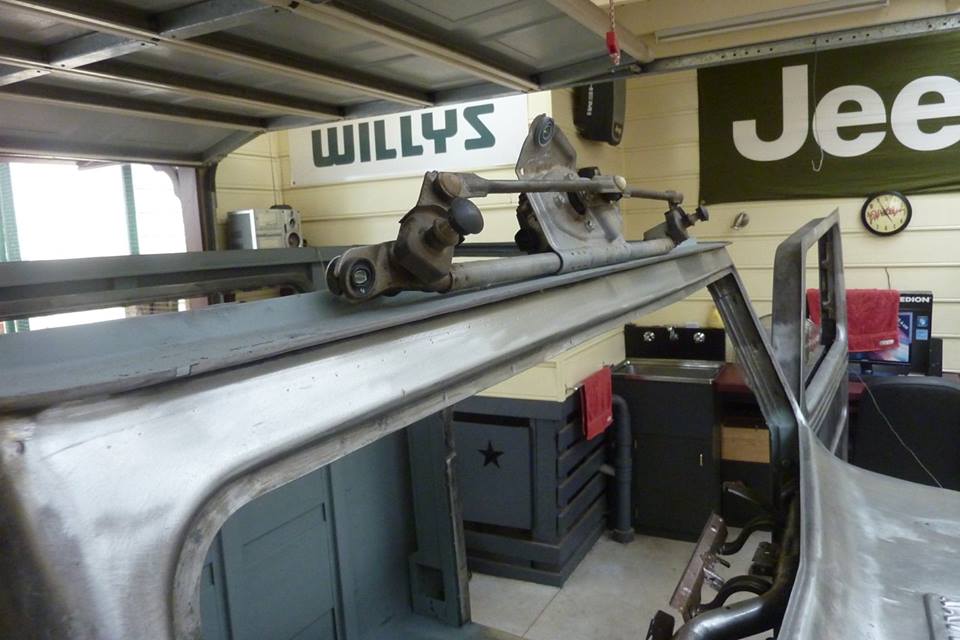
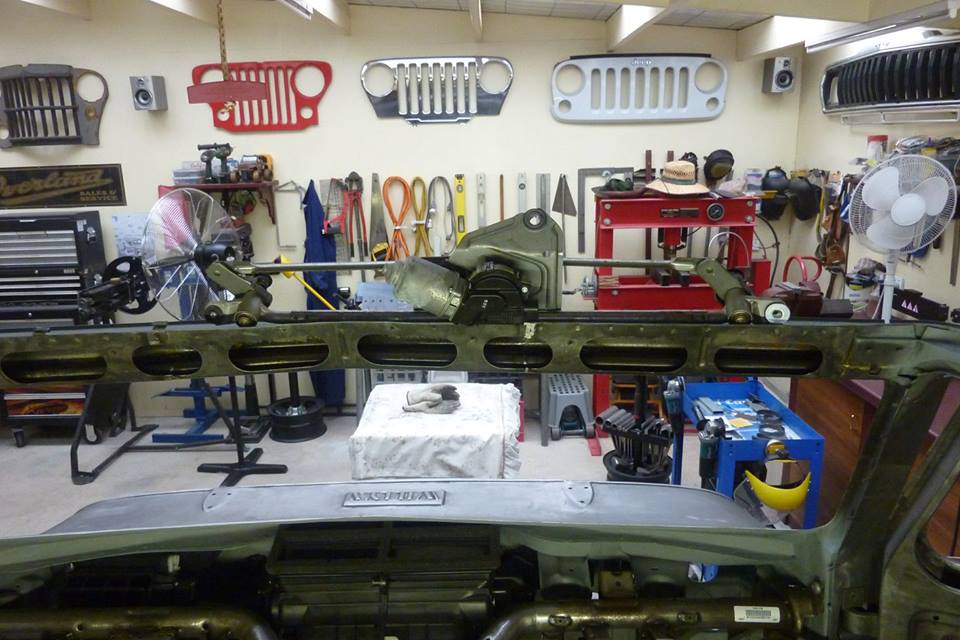
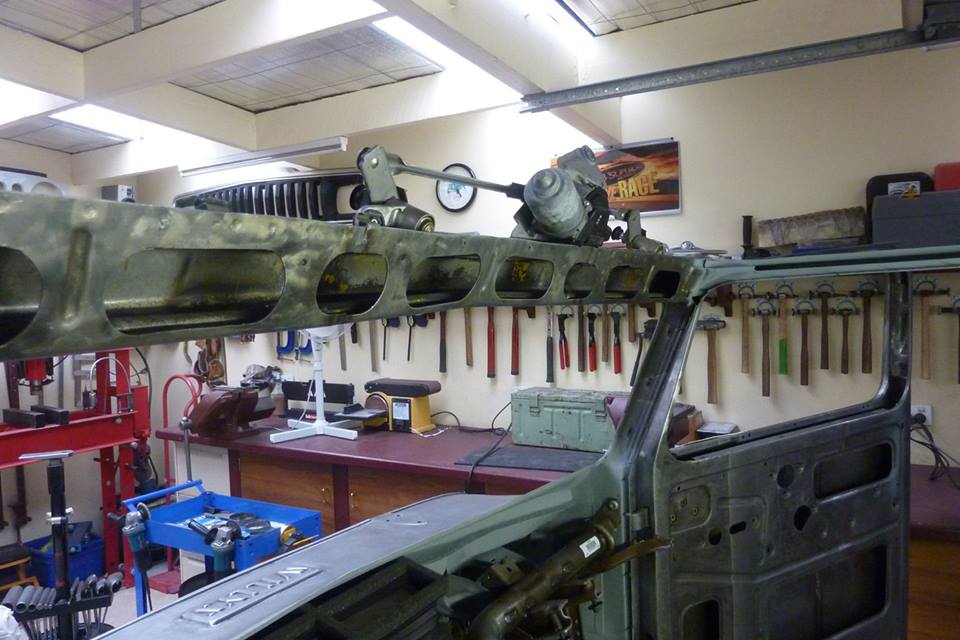
While things are getting laid out and still are accessible, I looked at where the wipers can go. There is just no room for them in the cowl area like I suspected.


Willys993.jpg

I could maybe flip it upside down and put the donor unit into the header panel. Have the pivot points come in below the gutter in the middle of the panel above the windscreen.


Willys994.jpg

I would have to cut a lot away to fit it into the header panel and then make a new frame over it to put the strength back. Even sunk all the way the motor would still sit up about 50mm-2" above the header. I checked the roof panel height and it would still clear it though.


Willys995.jpg

The only problem is that the wipers would now park vertically which I don't want. Reversing the polarity only works if the housing is not grounded, so would have to check that to make the motor turn the other way. Some gear boxes have a parking plate that can be turned 180* to alter the park position, otherwise a LHD one would work as they rotate in the opposite direction and are a mirror image of this one. A universal cable driven wiper unit might work but heard they are not as good as a OEM linkage arrangement?
 
Last edited:
The donor unit works in parallel. Are you planning to offset the unit to one side and maintain the stock operation, or rework the linkage to get an opposed setup?
P.S. I like looking at your shop in the background almost as much as the Willys.
 
Last edited:
wipers

How tall did the front glass end up? as in how long a wiper blade can you use.

Is there anything to be done with the defrost ducts to gain a bit of clearance??

I have hopes of mounting a wiper motor on the outside of the fire wall where it can be reached.

I have to say that cables don't do a lot for me
 
The donor unit works in parallel. Are you planning to offset the unit to one side and maintain the stock operation, or rework the linkage to get an opposed setup?
P.S. I like looking at your shop in the background almost as much as the Willys.

Would run parallel setup rather than the stock 'clap hands' movement. There is just not enough room in the header to have the linkage arm to sweep downwards on one side.

How tall did the front glass end up? as in how long a wiper blade can you use.

Is there anything to be done with the defrost ducts to gain a bit of clearance??

I have hopes of mounting a wiper motor on the outside of the fire wall where it can be reached.

I have to say that cables don't do a lot for me

Glass is stock height as just sectioned the cab below it when doing the roof chop.

Got some ideas for the defrost ducting, but see how it works out.
 
Something I love about joining a forum is there is so much 'stuff' to read, your thread has been seriously entertaining over the past few nights, mighty impressed with what you're doing, and the way you're doing it.

On the wiper front, have you looked at the classic Mini setup ?
 
Something I love about joining a forum is there is so much 'stuff' to read, your thread has been seriously entertaining over the past few nights, mighty impressed with what you're doing, and the way you're doing it.

On the wiper front, have you looked at the classic Mini setup ?

Manys thanks mate. :)
Have brand new Mini wiper setup on the way from England at the moment. :D
 
Waiting to see what you make of the Mini wiper rig.

Wiper solutions are up on my list soon.

Looking at the massive dash structure you have from the donor has me thinking I may ad a stretcher bar between the A pillar posts of my roll cage. I was trying to keep the cage from being "intimidating" as my wife referred to the one in my 61 wagon I drove when we were dating.

I know you get lots of compliments on your shop, well here goes yet another. Wife was peeking over my shoulder a couple nights ago and commented on how sharp your shop looks. That is an awesome compliment given she is an OCD, Japanese American, Tiger mom/financial controller, raised by a Tiger mom/tidy home maker, who thrives on everything being in its place kinda girl.

I replied asking if I could have 1/10th her budget for the home remodel for enlarging my shop. I don't think she said one word the rest of the night.

As always I love looking over your pictures and the amount of detail you post regarding what you are working on.

Your build along with a few others here has inspired me to try things I would not have.

A sincere Thank you for your posts.

Duane

Many thanks for passing on what your wife thought. :) Seems I have some OCD myself but like it that way. Just as well I keep the house, Jeep and camper etc the same way too!

Most of the parts have arrived now for the wiper conversion and will get on to it soon.
 
Could someone please give me the distance the stock wipers are apart and how far below the rubber windshield gasket they sit? Either Truck or Wagan as will be the same.

Cheers
 
42.8 cm between centers. 5.2 cm from center of holes to the bottom flat of the pinch seam. I do not have a rubber windshield seal handy and my window is out.
1959 wagon
Hope that helps.


Sent from my SM-G920V using Tapatalk
 
Marcus, I went out to the shop and attempted to provide you some measurements that you could use. But with the curve of the cowl and the 1/2" diameter of the lower windshield gasket, Im not sure they are of any value since the measuring ruler is pushed 1/2" away from the bottom edge of the gasket. For what its worth, the ruler is flat against the cowl on the first photo and parallel to the windshield on the second. I actually think the better measurements are those provided by Duane. On my stock 59 wagon (except for engine/steering), the wipers swing right to the edge of the upper gasket on the driver's side and slightly less on the passenger's side. They both reach to the bottom outside corner of their respective glass. I used the edge of the bezel since I figure you have one and so know the distance to the centerline of the wiper shaft. I can go back out and use a couple machinists squares and try to get something more precise. What exact measurement(s) do you need?

125.jpg126.jpg
 

Attachments

  • IMG_1476.jpg
    IMG_1476.jpg
    38.3 KB · Views: 25
  • IMG_1478.jpg
    IMG_1478.jpg
    42.9 KB · Views: 24
  • 123.jpg
    123.jpg
    38.2 KB · Views: 26
  • 124.jpg
    124.jpg
    42.8 KB · Views: 28
Obviously had to doctor the photos to come out upright but have no idea why the sideways ones showed up too.
 
Back
Top