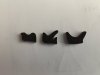
I have just glued my seal onto the passenger door using the 3M black adhesive.
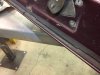
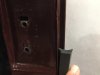
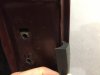
DISCLAIMER: I have gone contrary to the advice here AND the installation sketch on the Kaiser Willys site! The recess on the cab is only about 5/16" deep and the lip of the door plus the seal lip have to sit in there. You can see in the first pic below (recommended method) that the seal would make initial contact way before the door is closed. In the second pic (the way I installed it), the seal will still be able to make contact when the door is closed. It just seems (in my mind) to make more sense this way. I have yet to install the door, but will let you all know how well it operates and seals shortly.
Sorry for hi-jacking your thread Steve, but I figure it's better for future searchers.

")