51 pickup from Iowa

agne2520

Well Oiled
Jan 23, 2011
1,469
eastern, iowa
First Name
brian
Willys Model
  1. Pickup
Willys Year:
  1. 1951
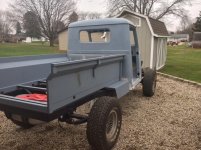
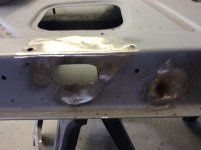
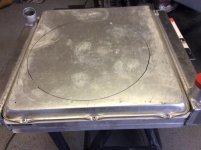
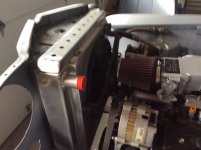
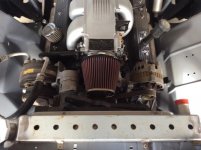
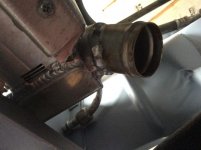
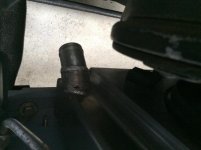
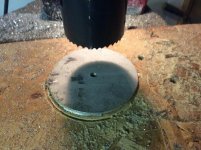
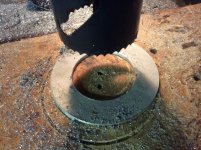
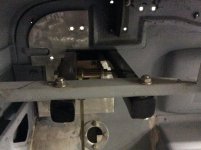
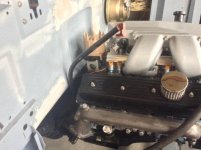
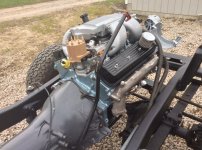
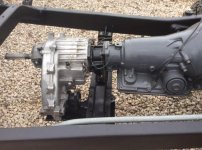
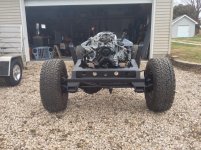
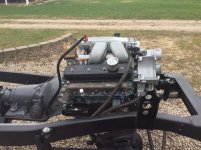
Hey all. Brian here. Thought I would finally make an attempt at a build thread. 51 pickup I've had since 1981. Retired now, so I have some time and a little more disposable income. To date I have totally boxed the frame and had it sand blasted and painted. Using narrowed axels from a 73 blazer and had the knuckle drilled and tapped for hi steer. Front springs are also from the blazer and rear are stock. Saginaw steering box, s-10 fuel tank with in tank fuel pump, 70s vintage GM tilt steering column, fire wall mounted pedals, and power brake set up. Just finished rebuilding a 92Pontiac firebird 305TPI engine, which was my first attempt, so we'll see how that goes. Primed it and got oil to the rockers, so, so far so good. Will hook up a pressure gauge and see how much oil pressure I have. Rebuilt the np 241 transfer case and installed the drive train in the frame and everything looks good. Have to take the 700r4 tranny back out and have it looked at. Guy I bought it from said it was in good shape, but, of course I have my doubts. Finished the metal work on the cab, which included firewall, both floors, tunnel, rocker supports, and rockers. Usual stuff. I decided to use two body mounts under the nose, instead of the stock center mount. Thought it would help make the body sturdier? Started body work, but my shop isn't heated, so will wait till spring. Bed was beyond repair, so I decided to build one with an M 416 military trailer in mind. Had the sheet metal bent up at a local shop and started to weld it up, but haven't finished. Built gauge pods and console, and sprayed with Raptor liner. Gauges are Marshall and seem to be nice. All for now.image.jpgimage.jpgimage.jpgimage.jpg
 

Attachments

  • image.jpg
    image.jpg
    60.4 KB · Views: 358
  • image.jpg
    image.jpg
    94.2 KB · Views: 353
  • image.jpg
    image.jpg
    80.3 KB · Views: 357
  • image.jpg
    image.jpg
    109.5 KB · Views: 353
  • image.jpg
    image.jpg
    87.1 KB · Views: 349
Last edited:
Nice work Brian! That console looks sweet! Post some pictures of the cab when you get a chance--- very nice work!
 
More pics. Having a hard time figuring this out.View attachment 25562View attachment 25563
Brian, I am flat out in love with this project. Very impressive how you did this. Would love more pictures and details. I am also in the process of putting in a 1992 Pontiac Formula 5.7 350TPI with a 700R4. I will be watching your build for sure.
 
image.jpgimage.jpgimage.jpgimage.jpgI'm planning on welding the bed together soon,so I decided to use some self tappers and mock it up. Got this far before the boss said I have to come in. Grandkids will be here soon from Chicago. That's when Christmas starts:)
 

Attachments

  • image.jpg
    image.jpg
    94.5 KB · Views: 233
Hi Brian. Suggestion: You might want to give it a little bit bigger gap where the bed front side skirt meets the cab. If you off road with your truck, your cab will flex some and as close as it looks on the picture, it may hit the cab and scratch your paint. It's coming along! Pivnic
 
Hey John. Good point, although I'm not sure it will end up that close, as the rear fender will dictate where the skirt will end up. The frame is fully boxed, so I don't think there should be a lot of frame flex and I'm using two mounts up front instead of one, so there shouldn't be much twisting to the cab. This is all theory, mind you as I have no experience to rely on. Let me know if you have any thoughts please. Gotta go. Grandson wants to read an arm full of books:]
 
Last edited:
Don't worry about oil pressure. If you have oil to the rockers with a drill motor you have no problem. You only need 10 psi per 1,000 rpm for good oiling.
 
nimage.jpgimage.jpg Been plugging away at the Willys. Finished welding up the bed and it turned out pretty good.Also have some issues with the doors. Fixed two small areas on one door, but the door bottoms are going to be more involved.image.jpg
 

Attachments

  • image.jpg
    image.jpg
    49.4 KB · Views: 137
  • image.jpg
    image.jpg
    44.4 KB · Views: 134
Last edited:
I think the single front mount was to allow the frame to twist without forcing the fenders to twist free from the body. Your frame will be much better than stock, but you might want to rethink that one detail- they were pretty smart. You are doing a beautiful job on everything, keep it up.
 
Hey Martin. Thanks for the input. Your point is well taken and after thinking about it, I'm sure you're right. No matter how much the frame is beefed up, there will still be some flex and the front fenders will tend to buckle somewhere. Going out to the shop right now to take a look at how I need to address this. Thanks again.
 
Hey Martin. Thanks for the input. Your point is well taken and after thinking about it, I'm sure you're right. No matter how much the frame is beefed up, there will still be some flex and the front fenders will tend to buckle somewhere. Going out to the shop right now to take a look at how I need to address this. Thanks again.

Been thinking on what I'll do about a fan shroud. Have a fan from a 92 firebird with no shroud. Happend to have an aluminum pan that I was going to attach to the bottom of my engine stand to catch dripping oil. Turns out this pan is a perfect fit width wise to fit my aluminum Be Cool radiator. I had to cut it length wise, as it was 25 inches long and my radiator is 19 inches long. I cut it 20 1/2" and put it into my home made brake to finish off the bottom at an angle, and then have it tig welded at the corners. I also need to cut off the radiator outlet tube and have it tig welded back on, so that it points down instead of up. Put the fan on the shroud and traced for the hole and cut out and tech screwed the fan to it. Fits snug, but fits. Now just have to shine it up a bit. Only hope this fan pulls enough air.image.jpgimage.jpgimage.jpg
 

Attachments

  • image.jpg
    image.jpg
    46.4 KB · Views: 138
  • image.jpg
    image.jpg
    47 KB · Views: 137
  • image.jpg
    image.jpg
    56.4 KB · Views: 142
  • image.jpg
    image.jpg
    71.9 KB · Views: 145
Last edited:
image.jpgimage.jpgimage.jpgimage.jpgThanks Martin. Don't usually get that lucky. Got the bed and skirts welded up and attached to the truck. Also finished the radiator and I made a cover for it and installed it where it needs to go. Fits tight, but fits.The radiator had to be modified, as the outlet was pointing up. Had some aluminum conduit the right diameter, that I cut to the appropriate angle and had a guy tig it for me. Had him also attach some flat stock to the sides of the radiator so I could fasten it in place. Disappointed as he wasn't what I would call an artist, but it looks like it will do. The rear fenders were not in the best shape, but I was able to fix some holes that were initially covered with bondo and although they still need some work, they are much better than they were. When the weather gets better I will wire brush the remaining bondo and rust and get them ready for primer.
 

Attachments

  • image.jpg
    image.jpg
    46.8 KB · Views: 156
  • image.jpg
    image.jpg
    58.4 KB · Views: 172
  • image.jpg
    image.jpg
    51.9 KB · Views: 157
  • image.jpg
    image.jpg
    48.1 KB · Views: 152
I've had a steering column out of a 70's vintage GM car sitting around forever and made the mounts to install it, but it's about 31/2" too long. Decided to finally tackle the job of shortening it. A lot easier than I thought and feels good to have it done.Had some 2" aluminum conduit that was the perfect inside ID to slip over the column lower section. Cut some aluminum flat stock and drilled holes to mount it to the firewall and will have the engine side tigged to the conduit sleeve.image.jpgimage.jpgimage.jpgimage.jpgimage.jpg
 

Attachments

  • image.jpg
    image.jpg
    81.8 KB · Views: 117
  • image.jpg
    image.jpg
    103.7 KB · Views: 121
  • image.jpg
    image.jpg
    62.3 KB · Views: 126
Back
Top