1959 Willys Family Heirloom: Saving "The Jeep"

mramc1

Gear Grinder
Mar 6, 2017
20
Western NY
First Name
Josh
Willys Model
  1. Pickup
Willys Year:
  1. 1959
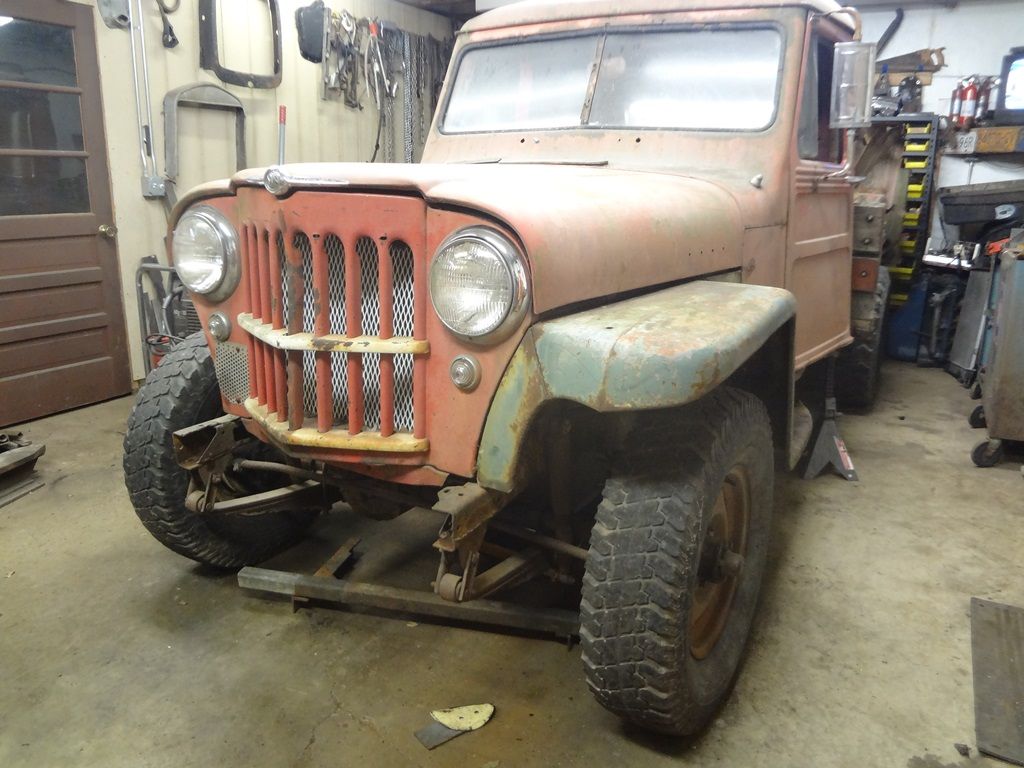
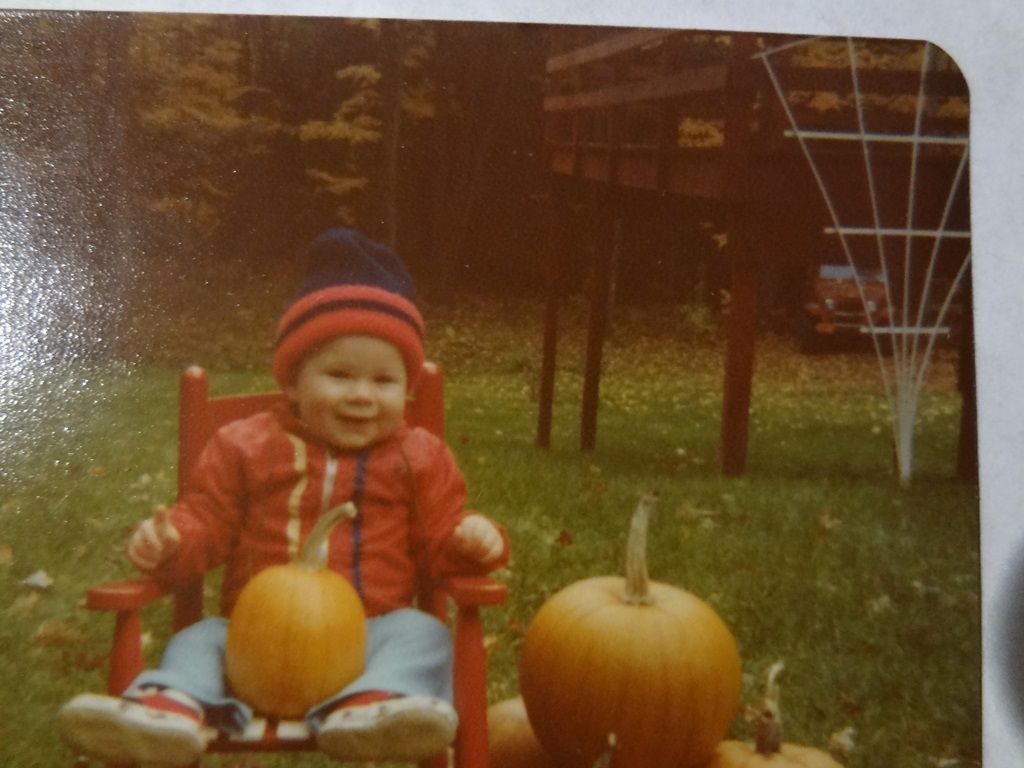
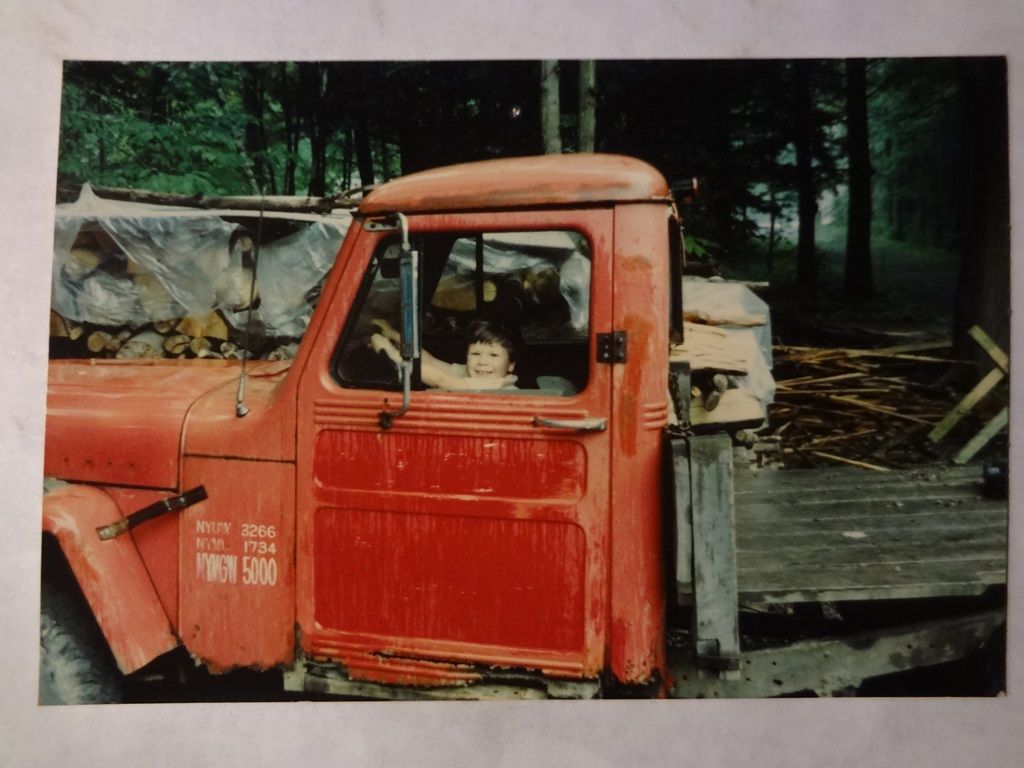
One of the first words I spoke as a toddler was "Jeep." As far back as I can remember this faded red Willys truck with a wooden flatbed has been parked along side the barn at my parents house. I learned to drive on it in the woods at 13. I rode on the ripped up junkyard bucket seats as my Dad drove out to cut wood. I would watch the water go by thru the holes in the floor as we crossed the creek to get into the woods. I remember the cackle of the tired Super Hurricane thru a straight pipe as the muffler had long since been knocked off. I installed a new timing chain, water pump, and distributor drive with my Dad back in 1995. I don't remember when the tree fell on the roof or when the flatbed was made, but I remember getting it stuck in 3 ft of snow one year and when the brakes failed and I had to stop by bumping in to a tree. I watched the Jeep work and slowly get a little older and rougher year after year, but it was always there. My Dad passed away this summer and I have now taken ownership of a very tired and rusty 1959 Willys truck. Follow along as I try to save it and keep it going for another 40 years.

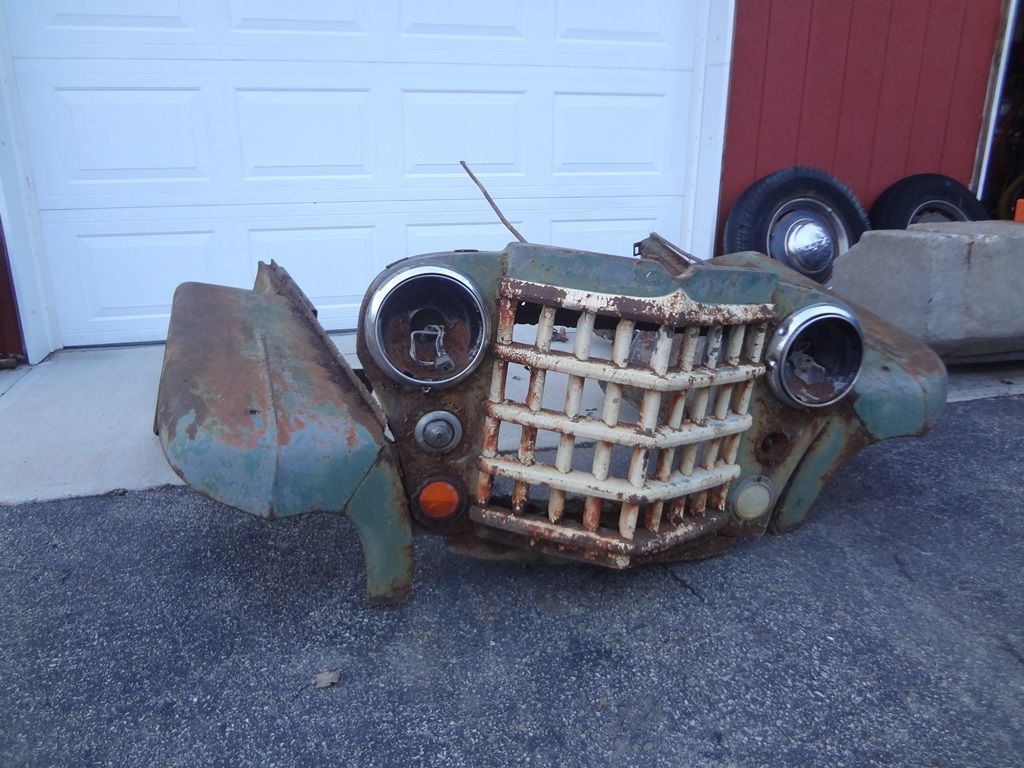
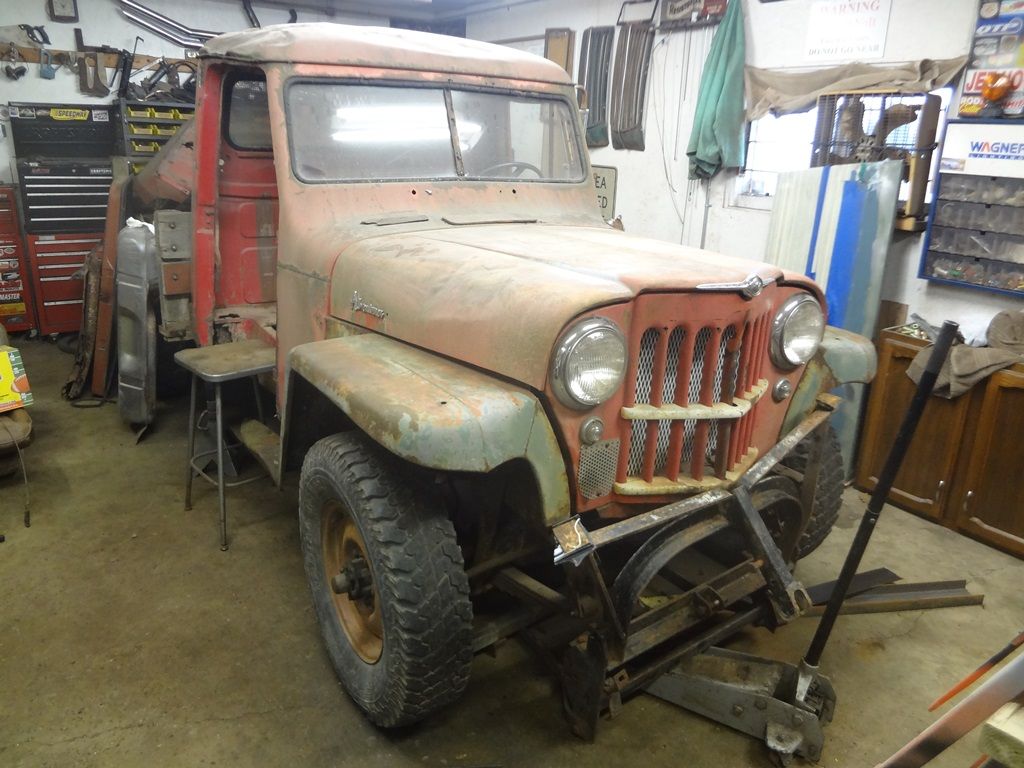
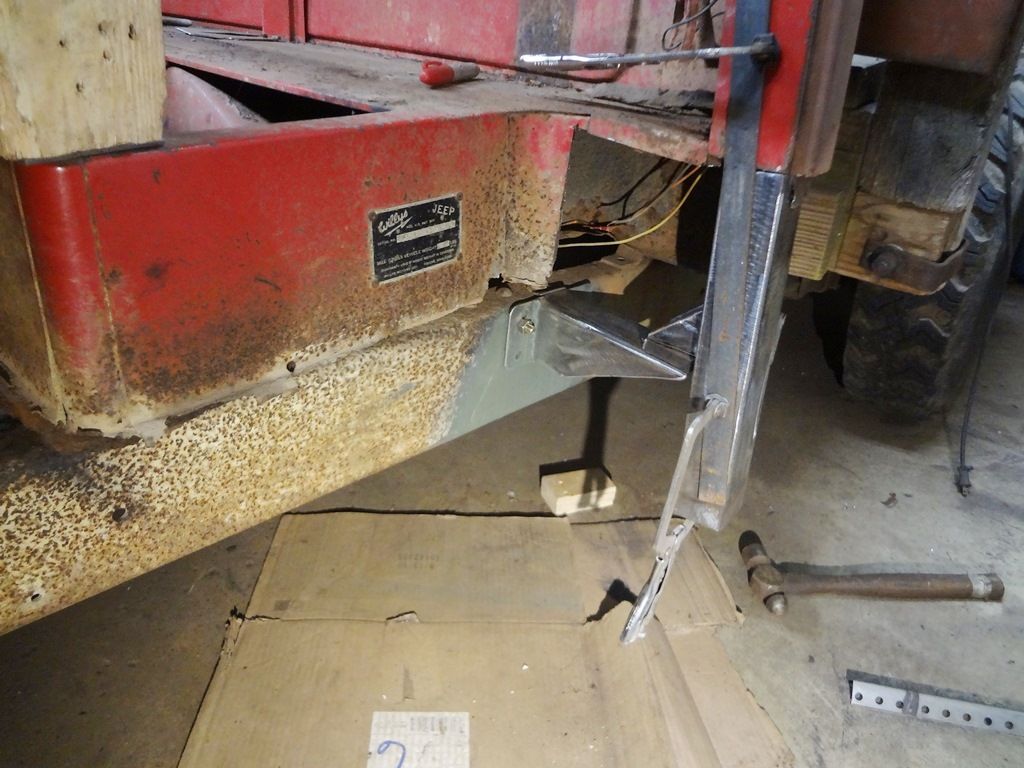
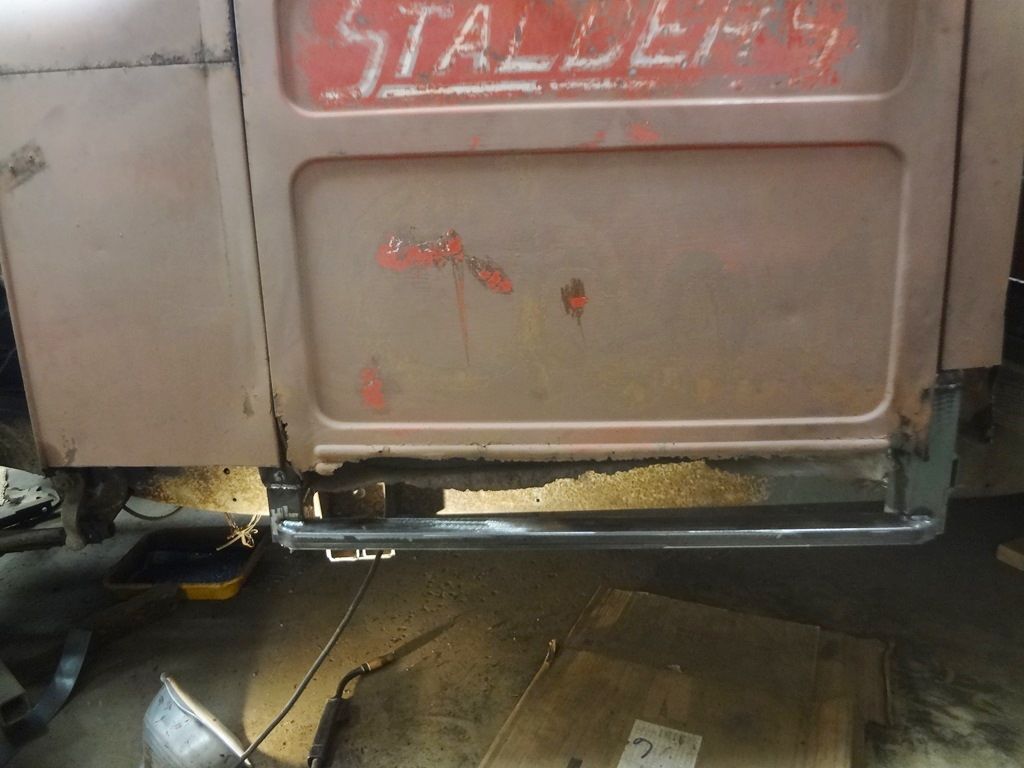
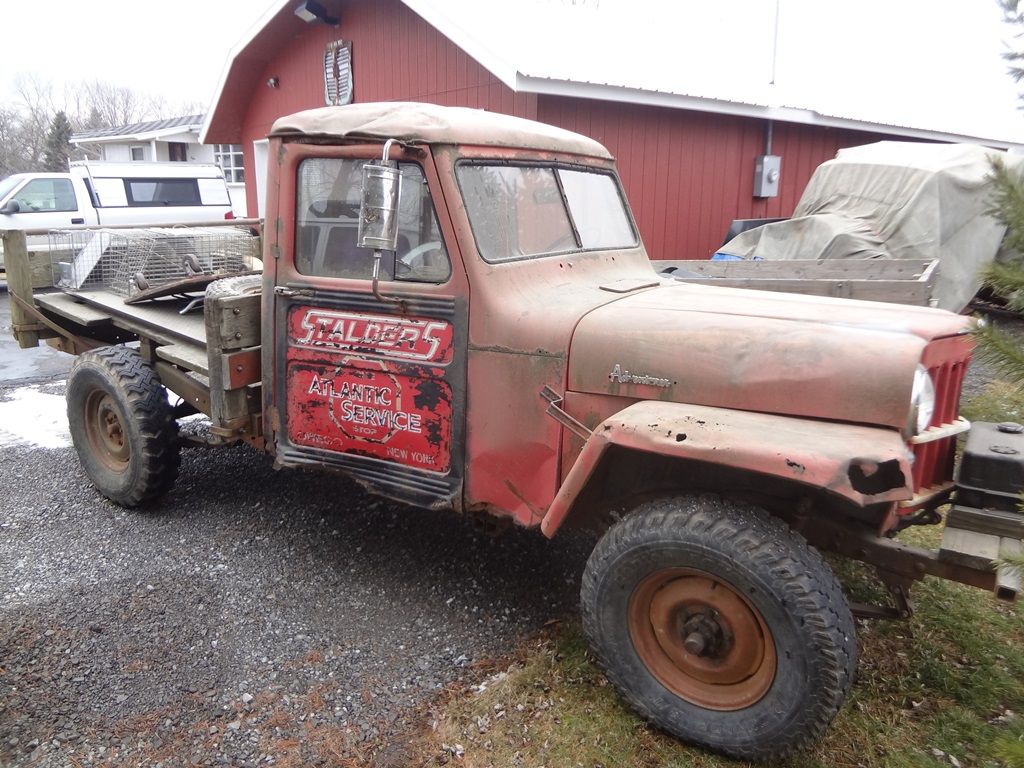
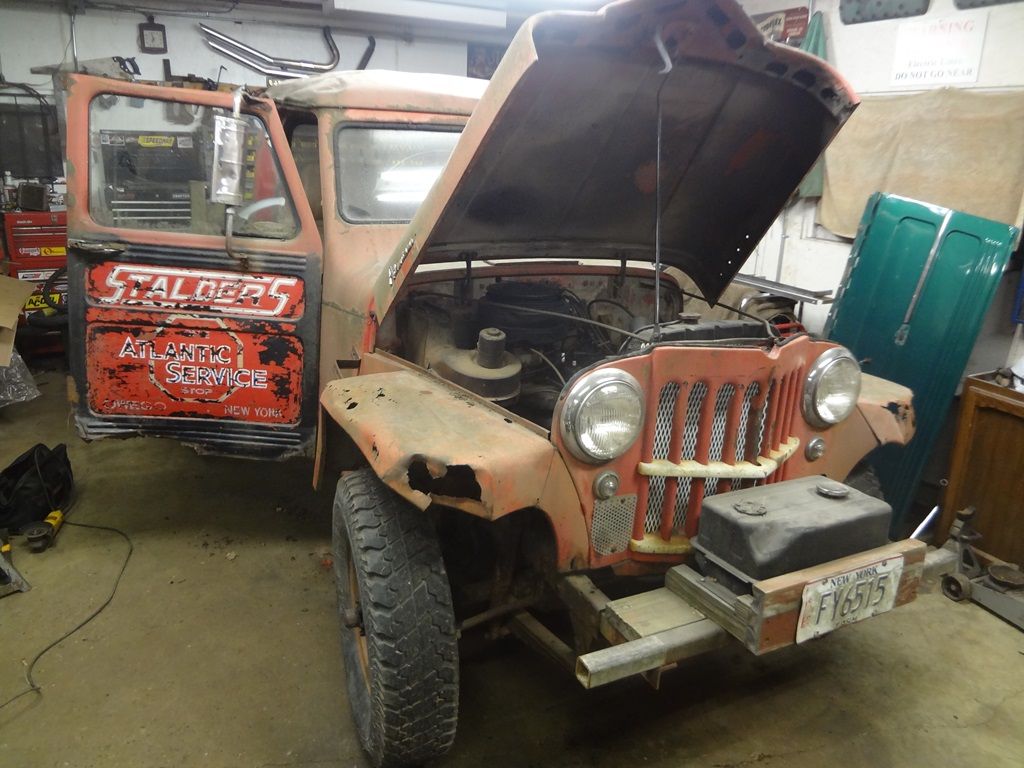
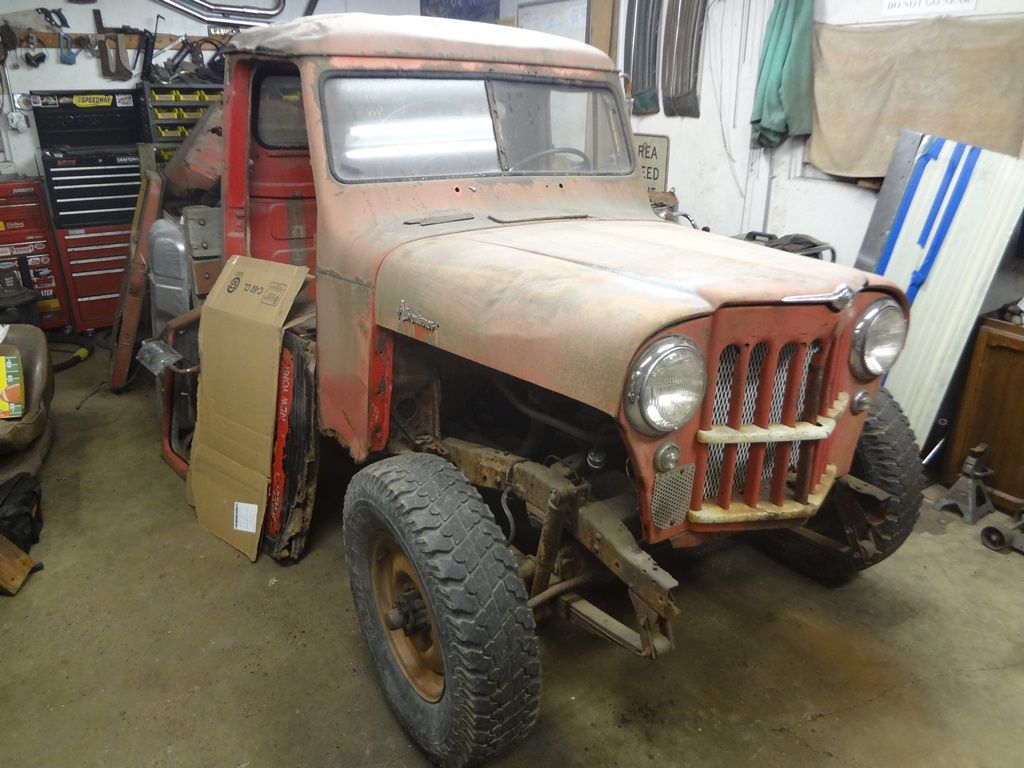
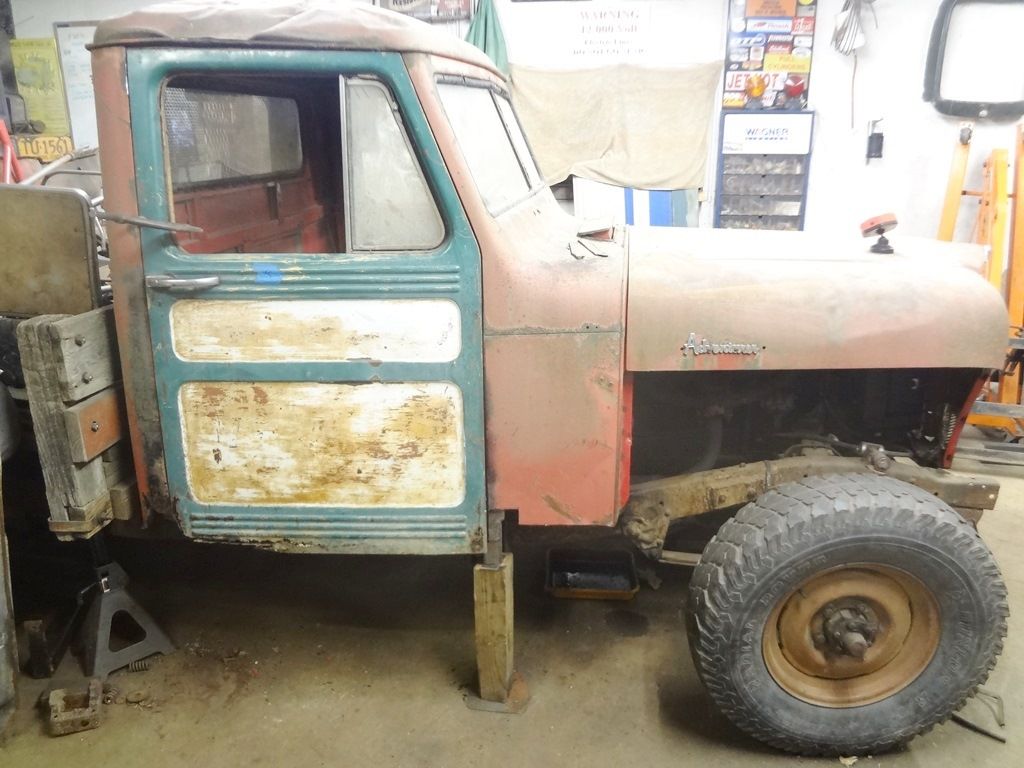
Here the truck is as of this winter. Originally a service truck for Stalder's Atlantic Service in Owego, NY I recently discovered the original door logo on the passenger door.

Jeep-06_zpstixi4ocn.jpg


Jeep-05_zps7k2jri3f.jpg


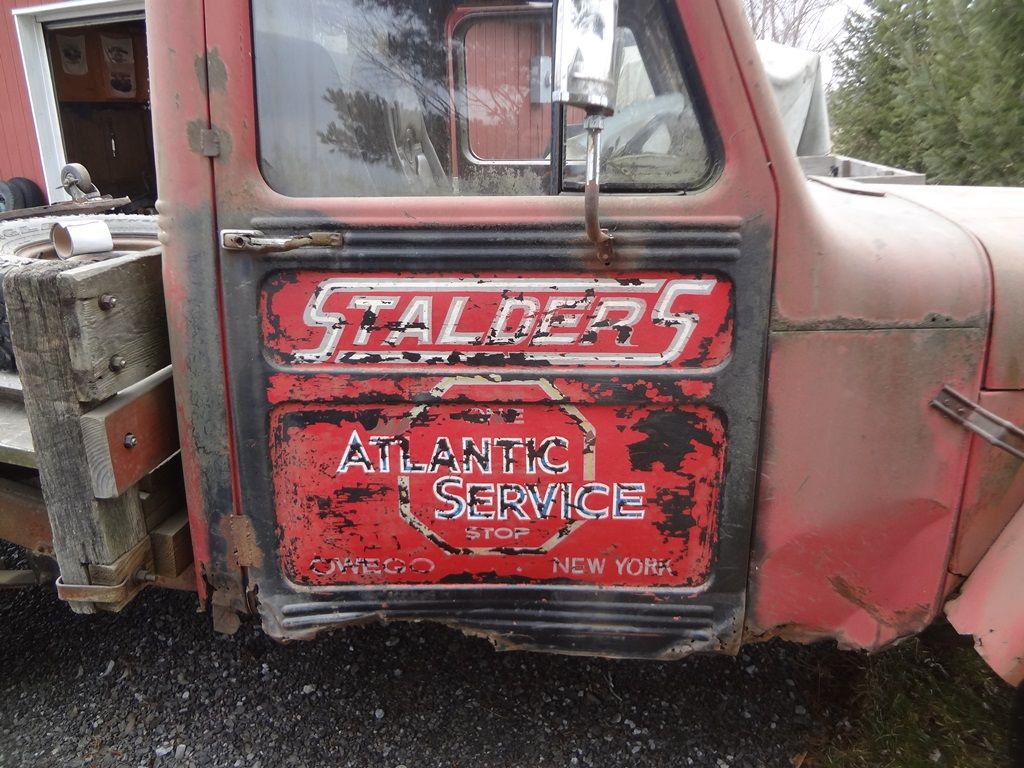
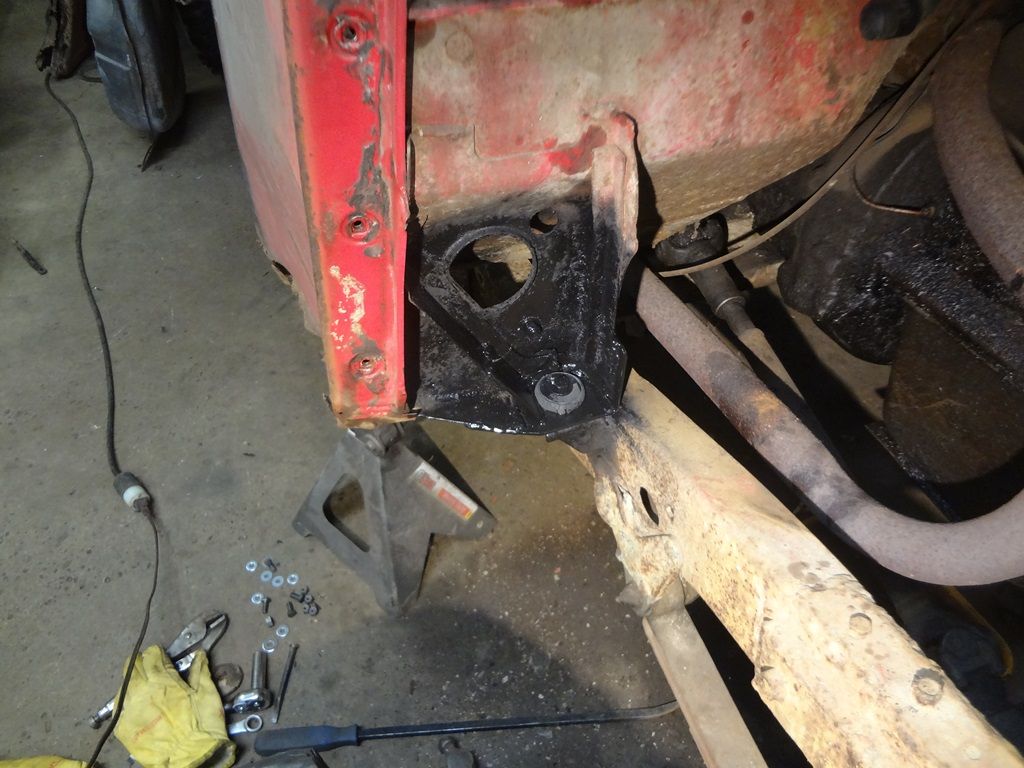
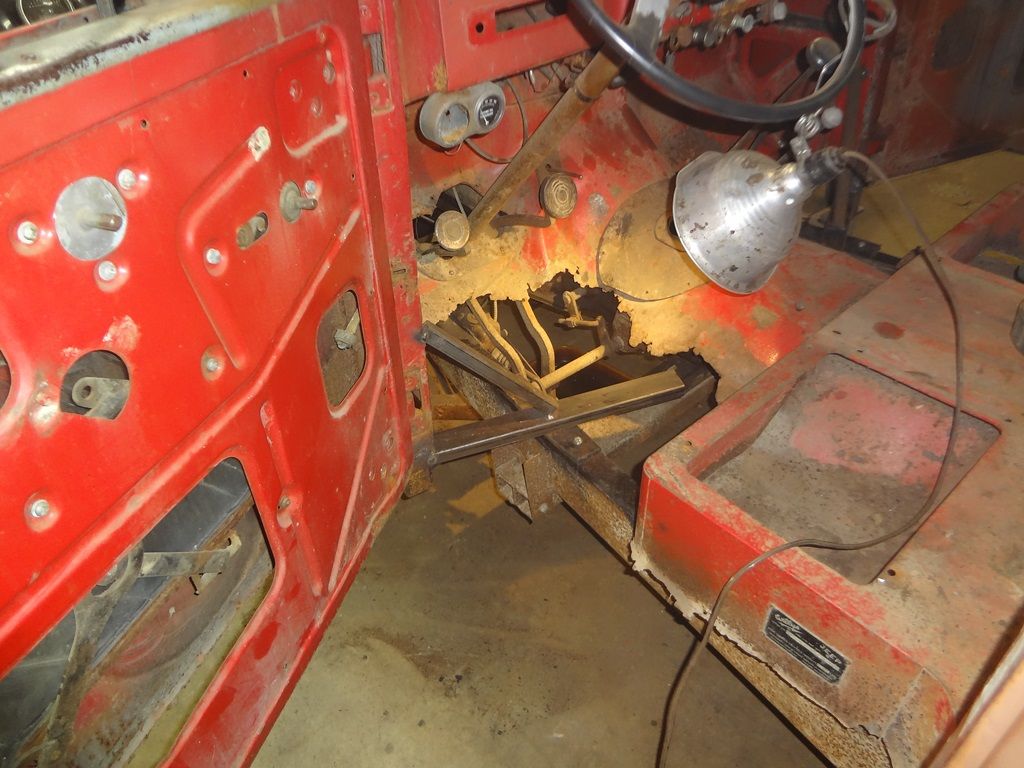
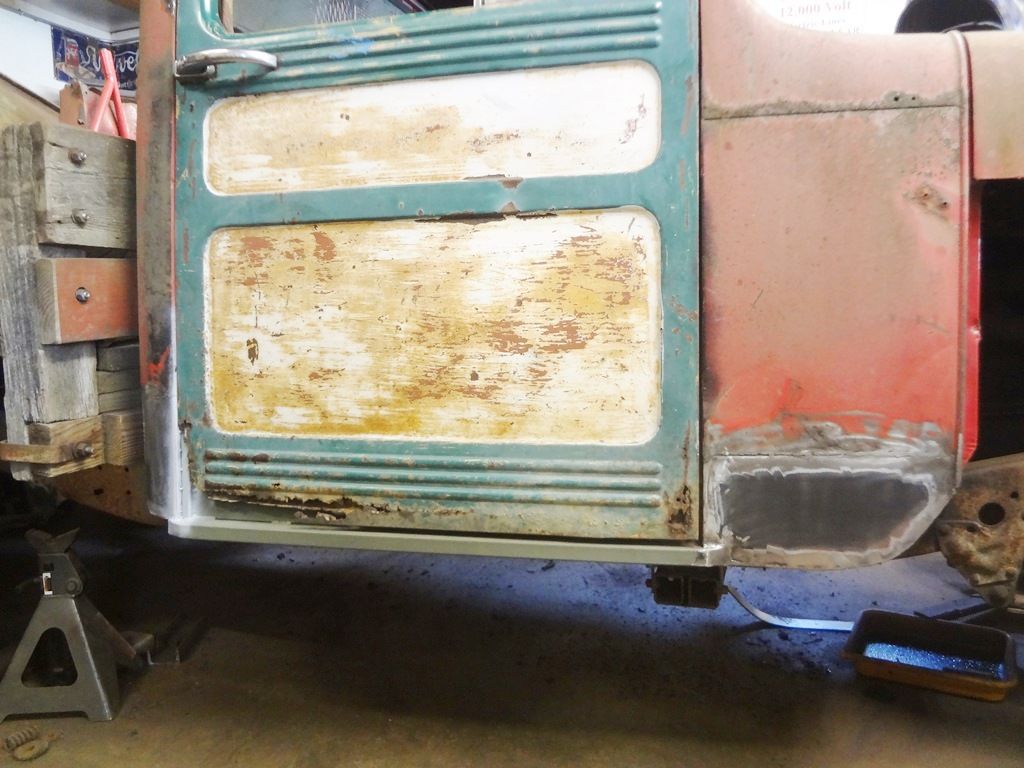
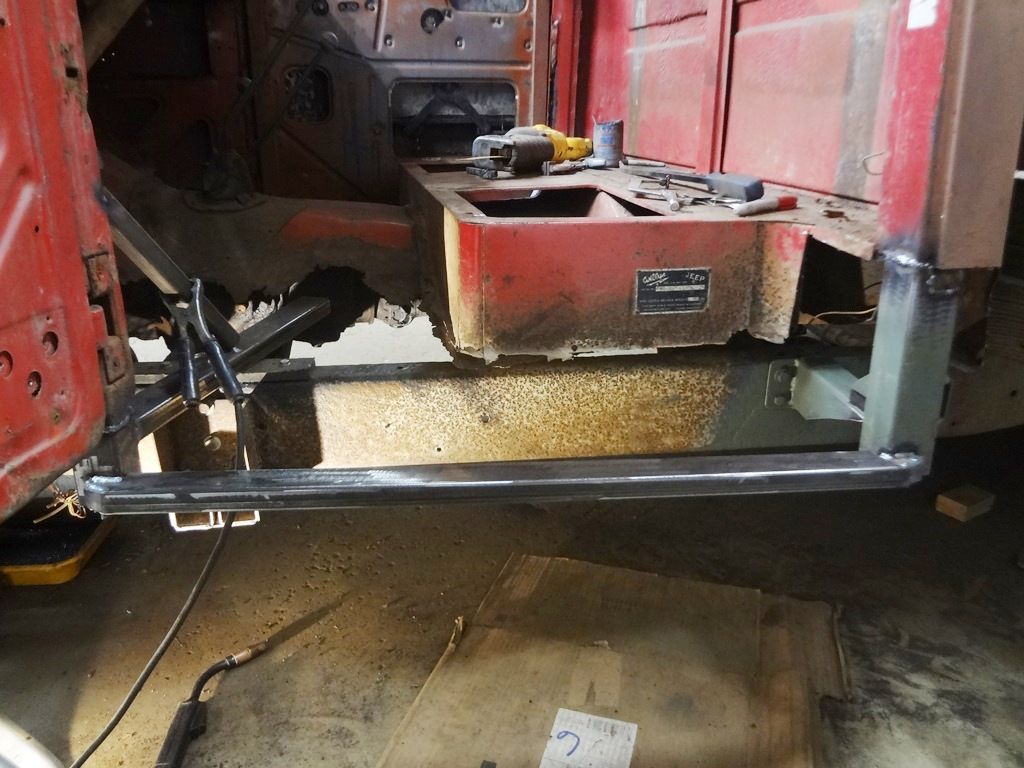
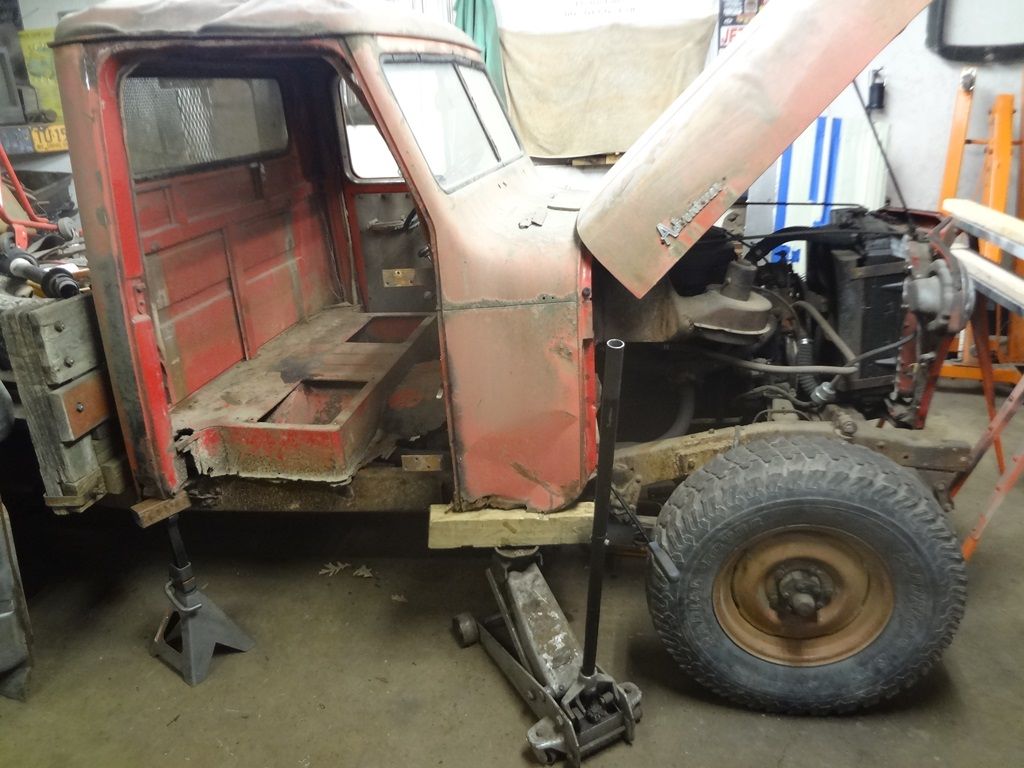
The first step to a resurrection is getting the body back into some kind of shape. When I started every single body mount was broken off or rusted off except for the grille mount. The passenger door had been welded shut as it didn't function after a tree fell on the roof around 1980. Here I have cut open the door and opened it for the first time in over 30 years.

Jeep%20floor-01_zpsioehwurc.jpg


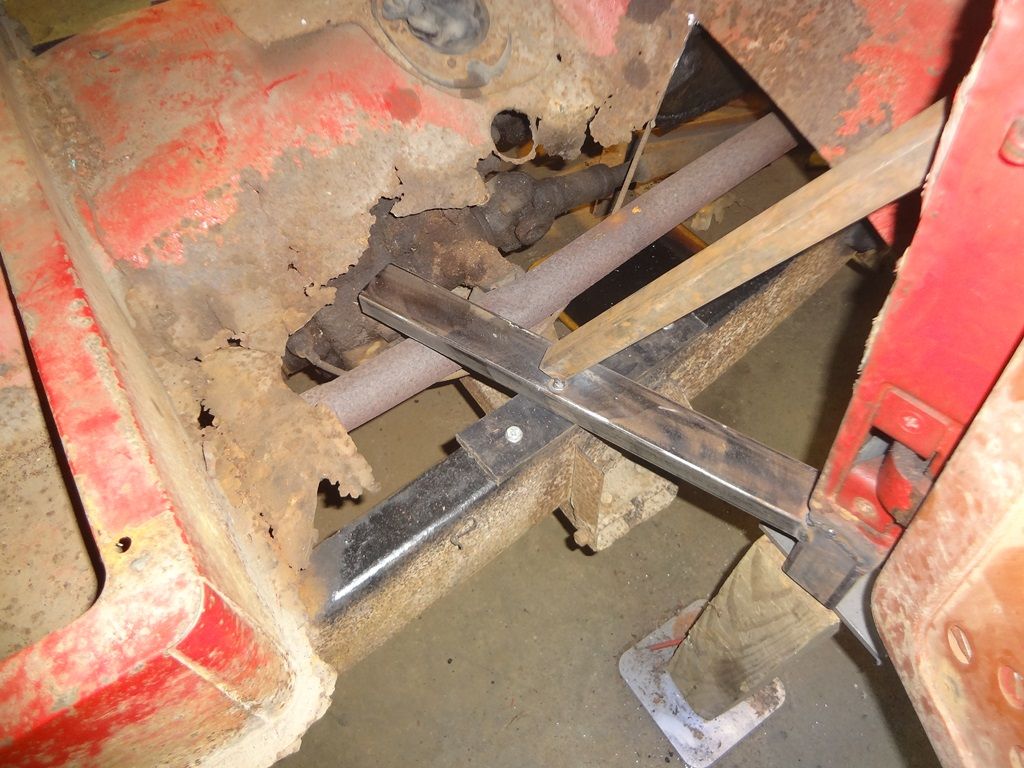
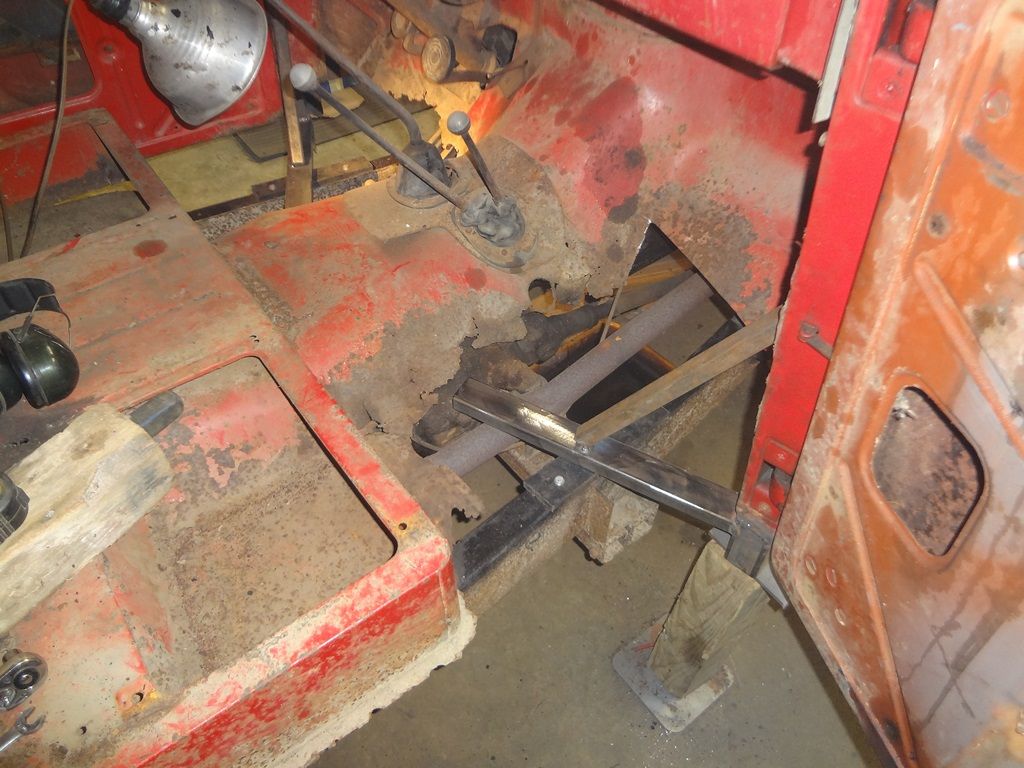
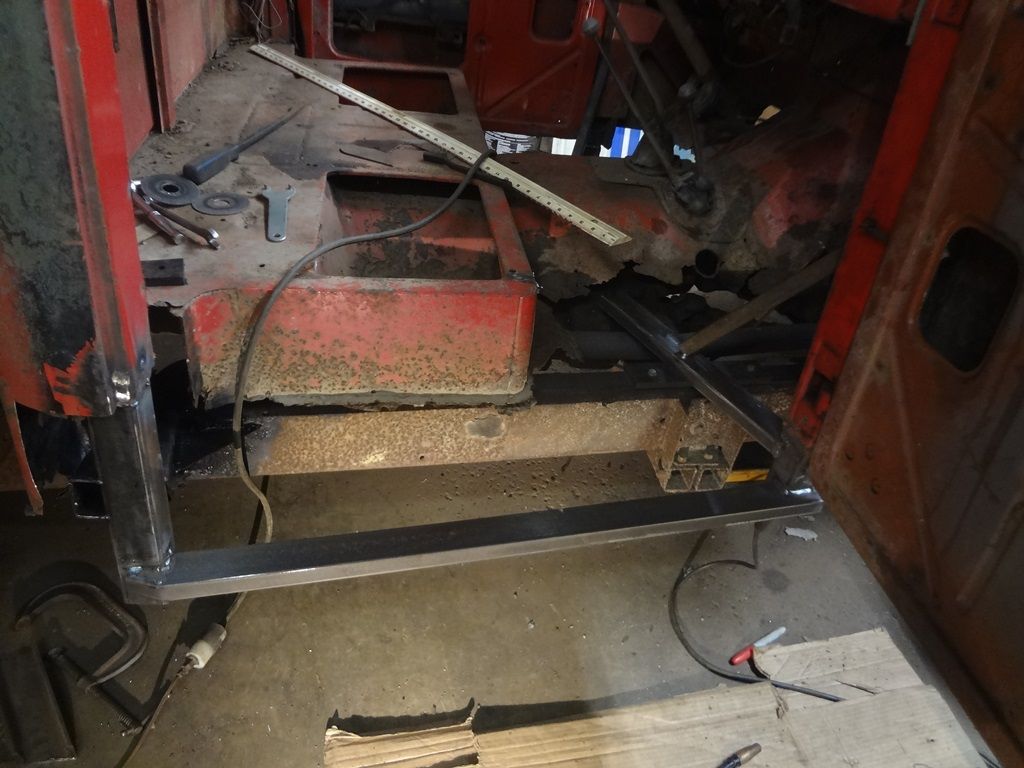
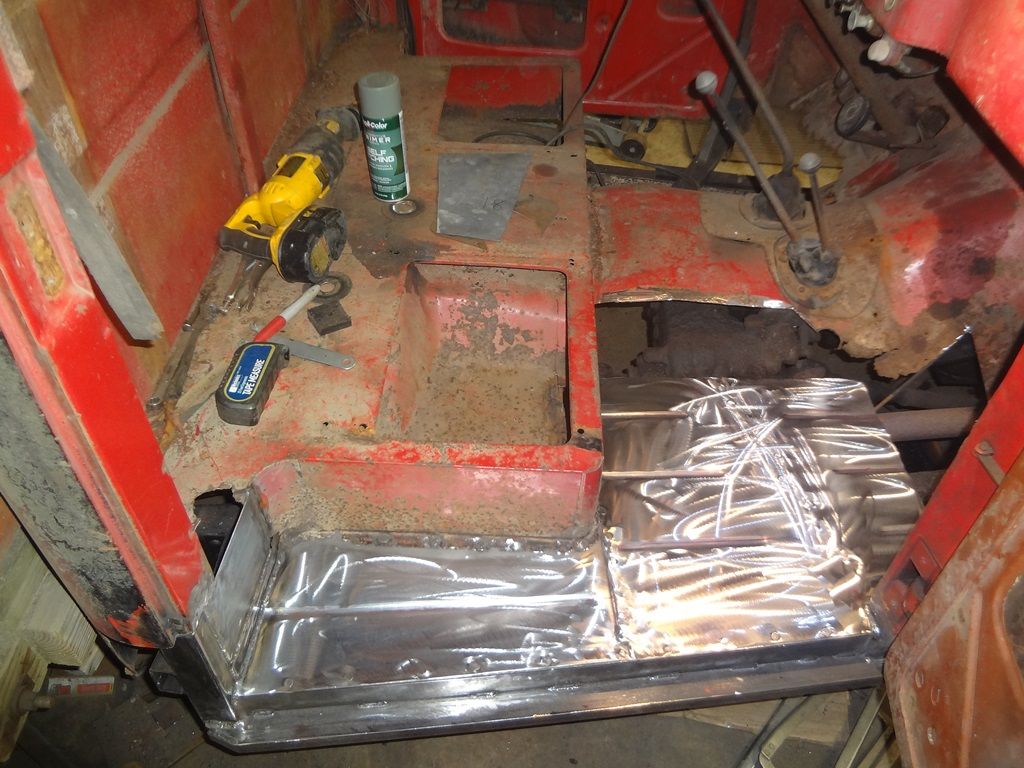
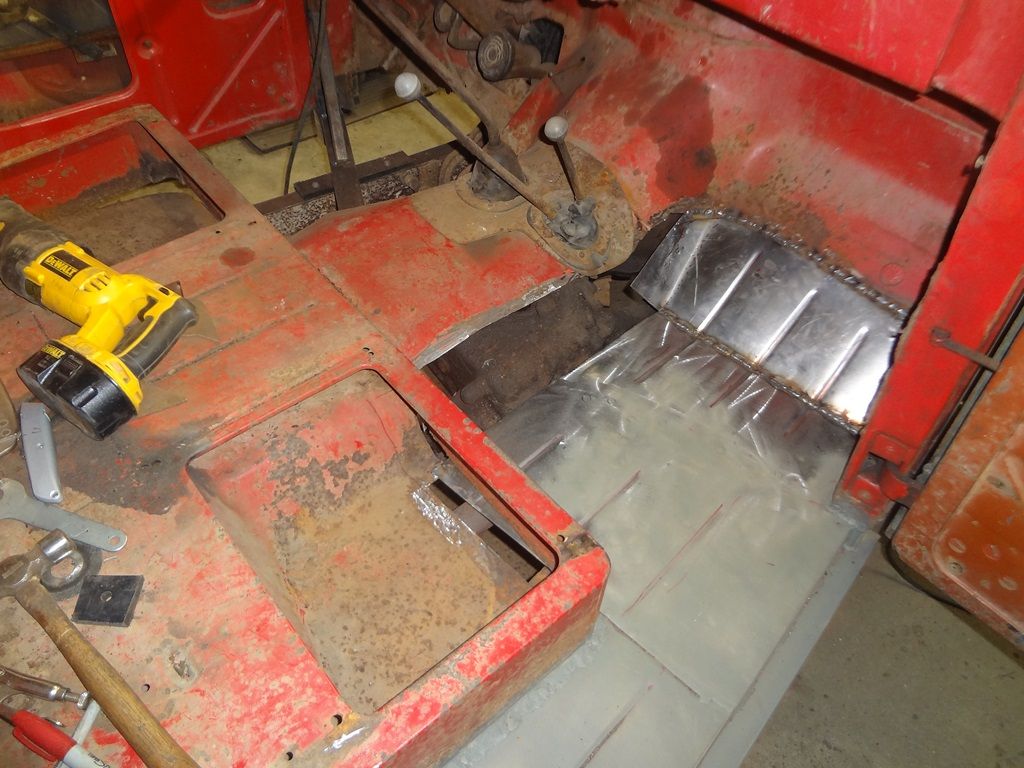
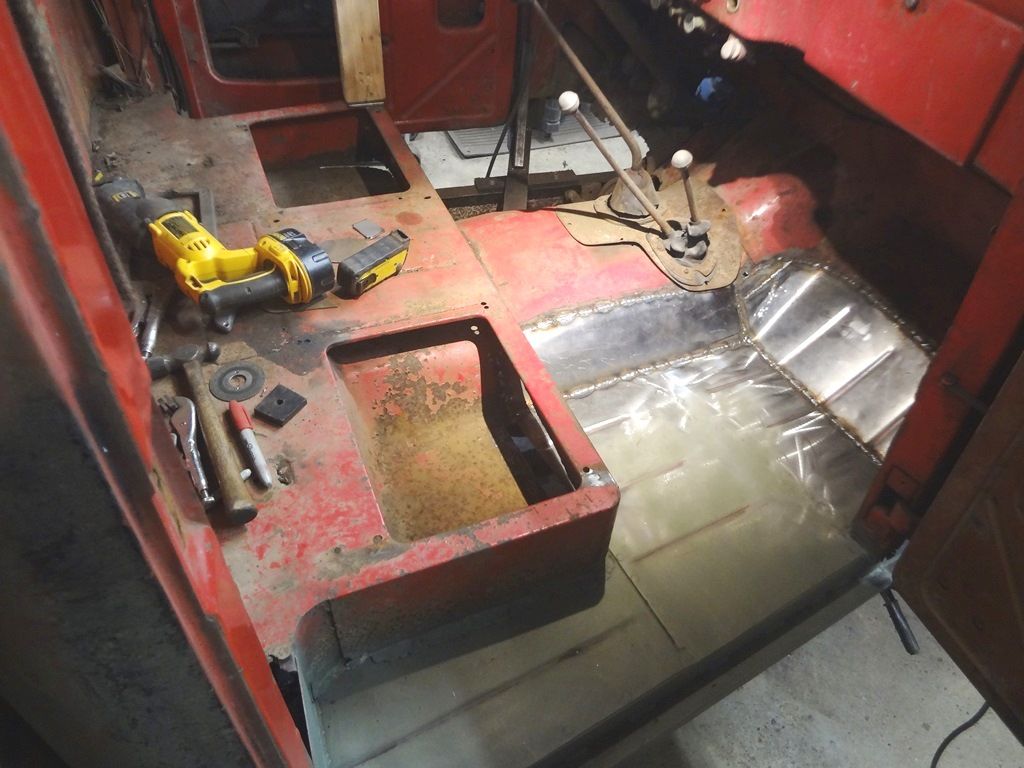
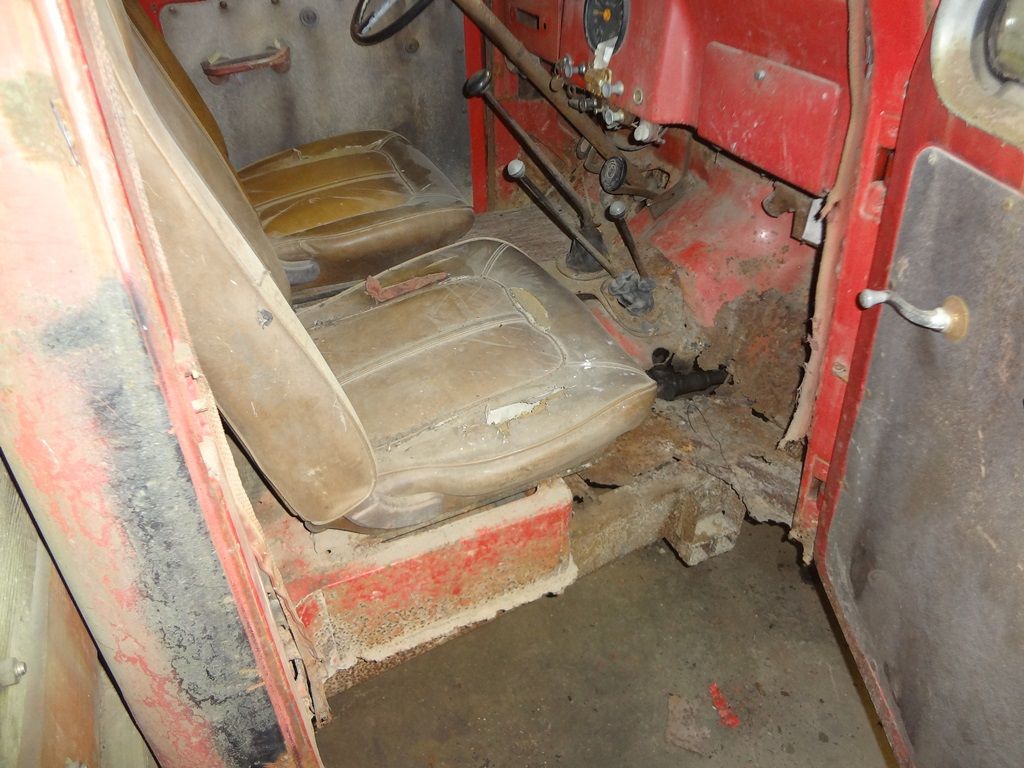
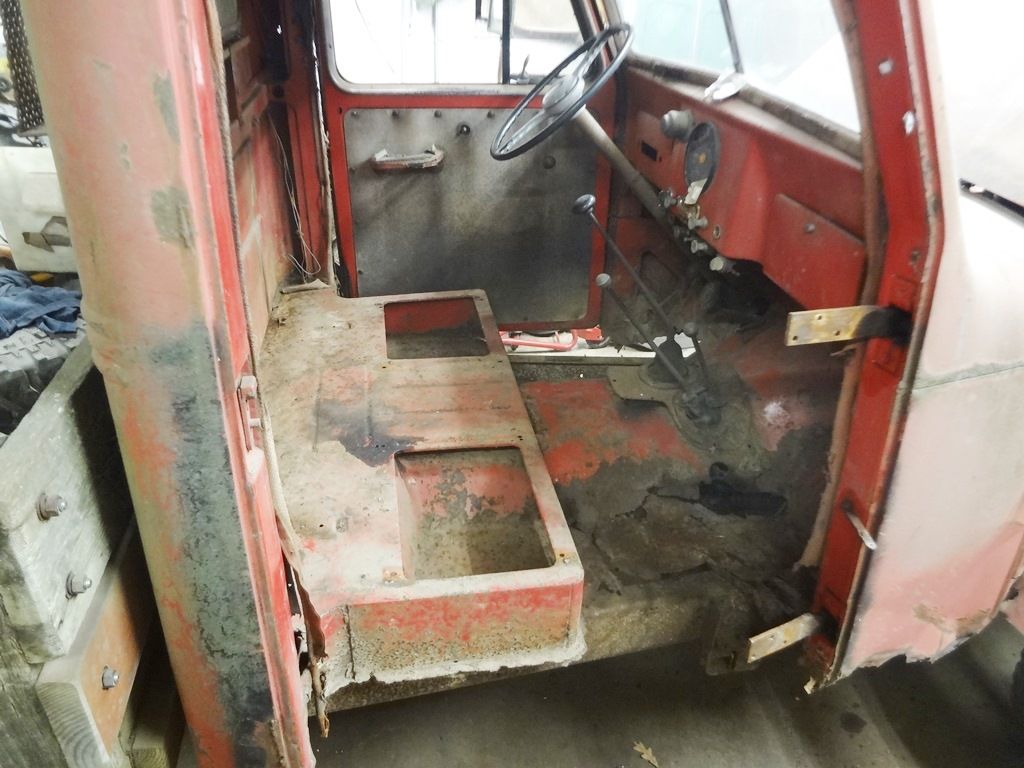
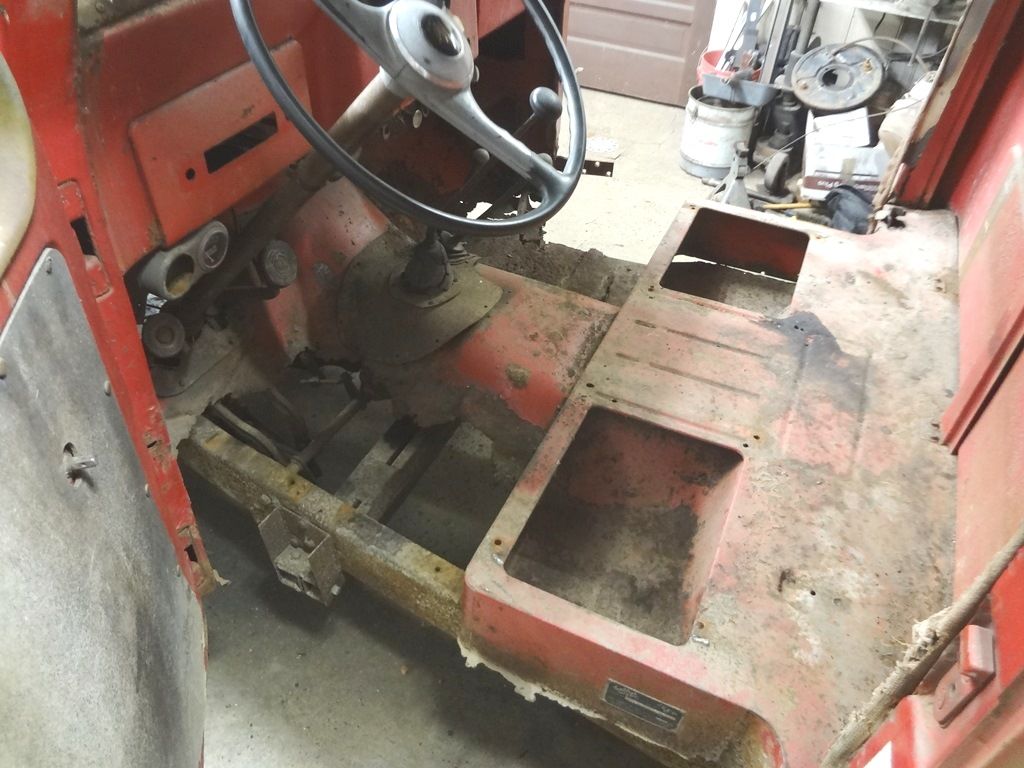
The floors are gone and all holding the cab together is a little bit of the tunnel.

Jeep%20floor-02_zpsuoeelarl.jpg


Jeep%20floor-03_zpsjv8uiodb.jpg


Jeep%20floor-04_zpsgisusbqx.jpg


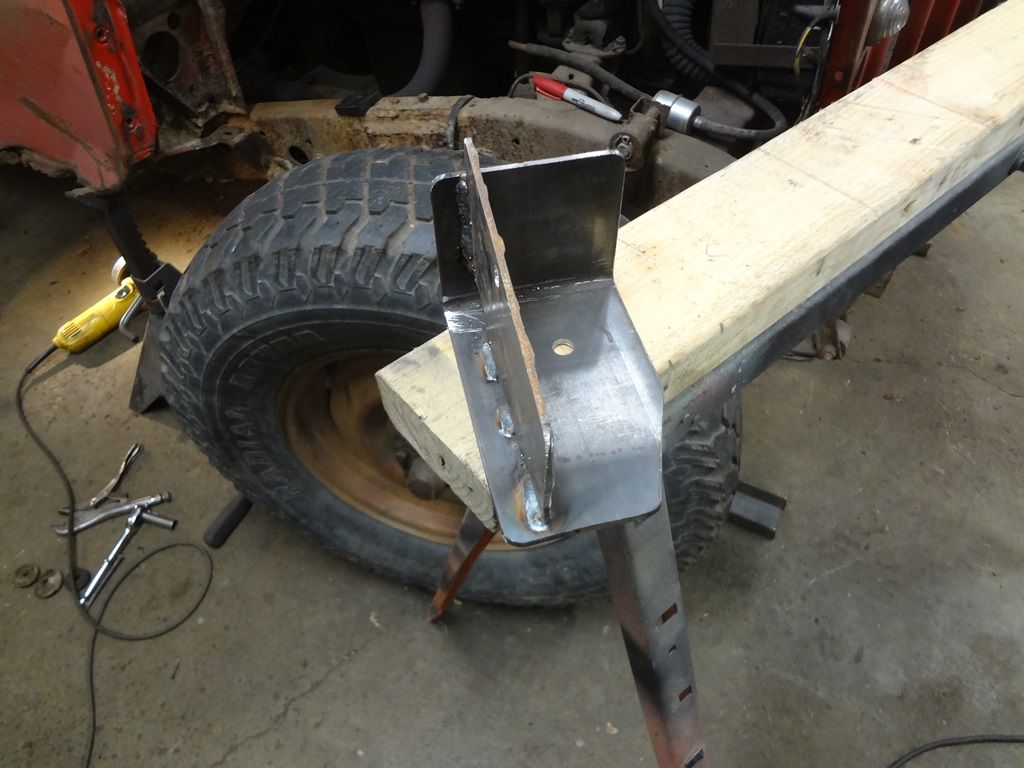
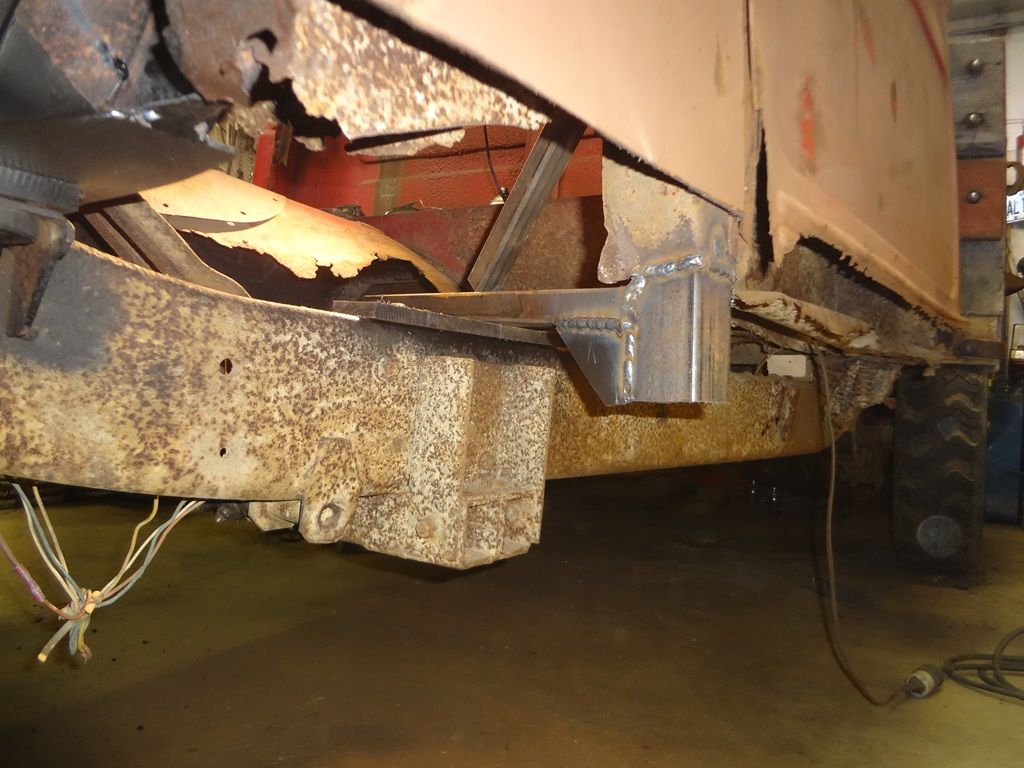
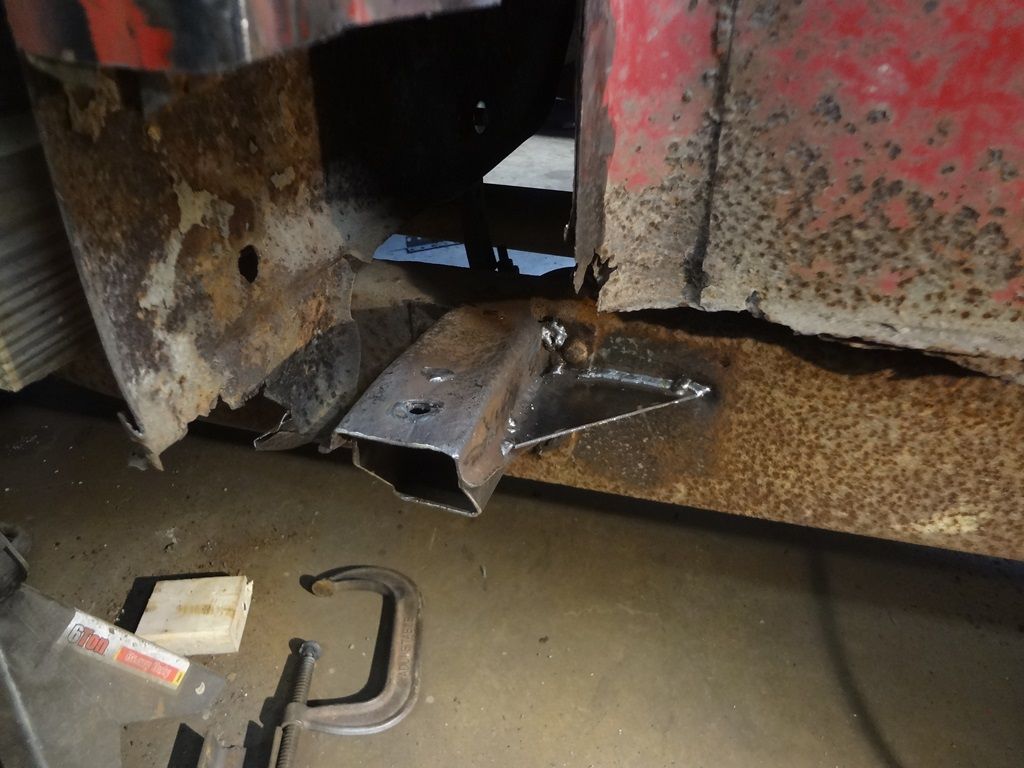
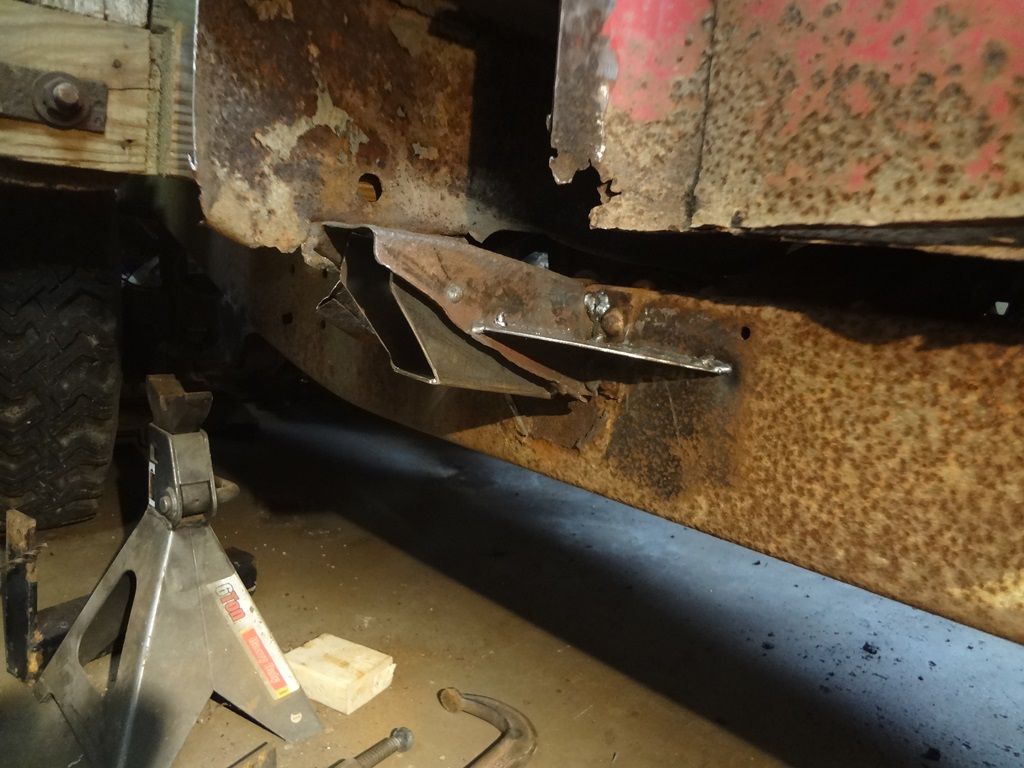
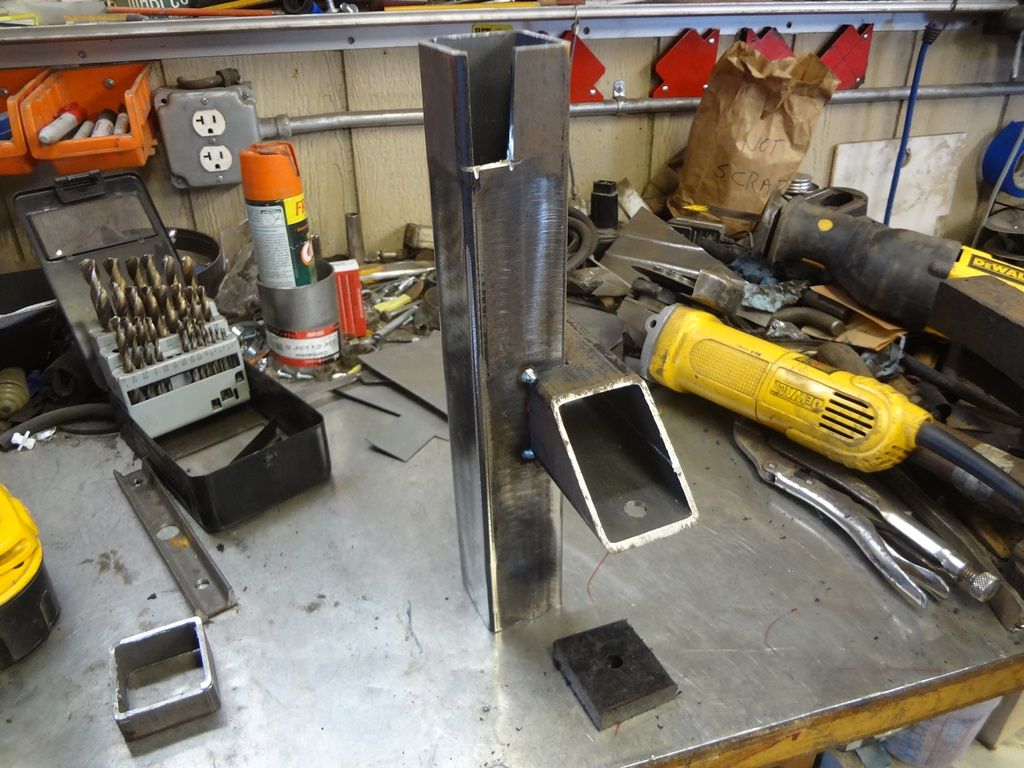
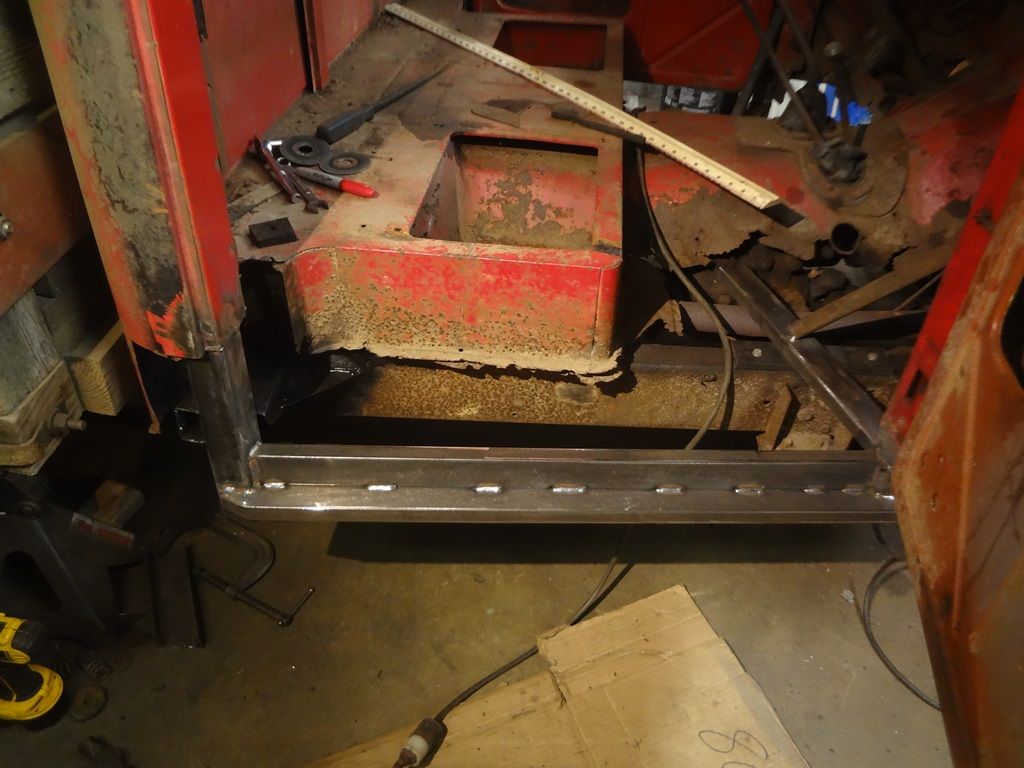
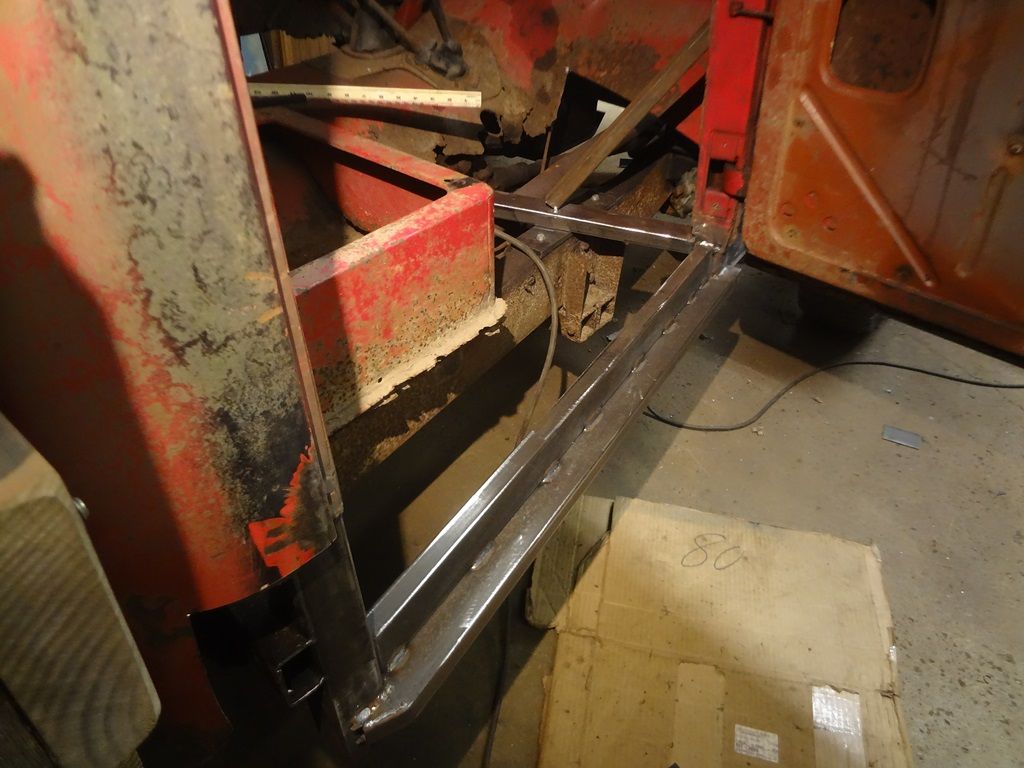
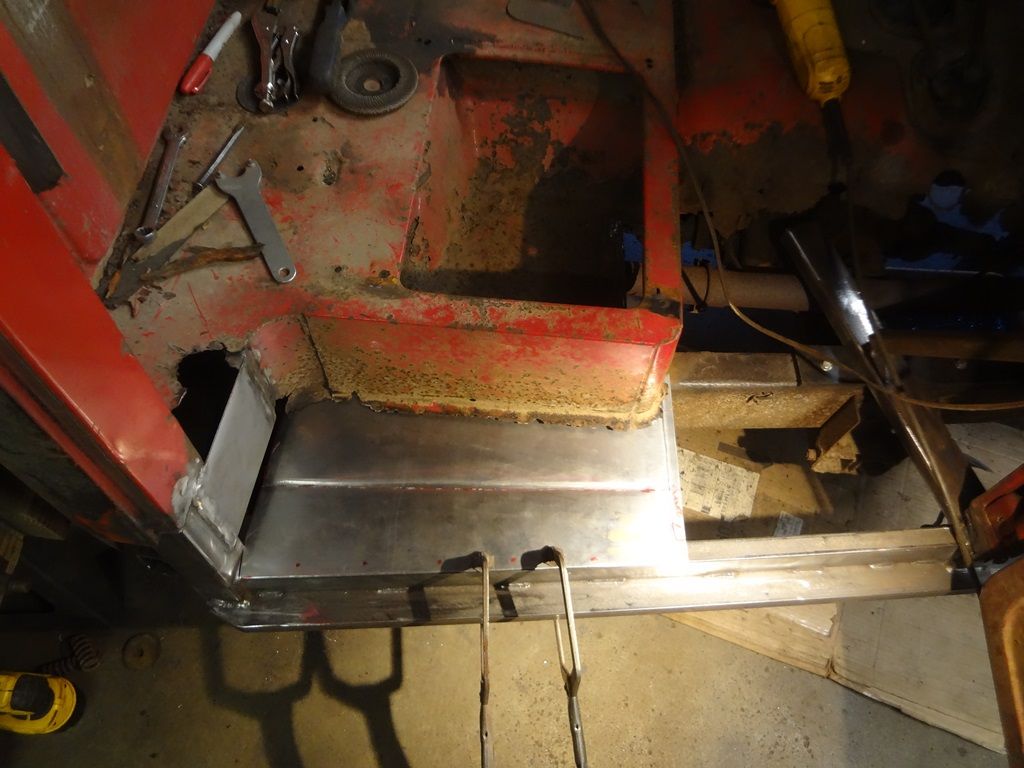
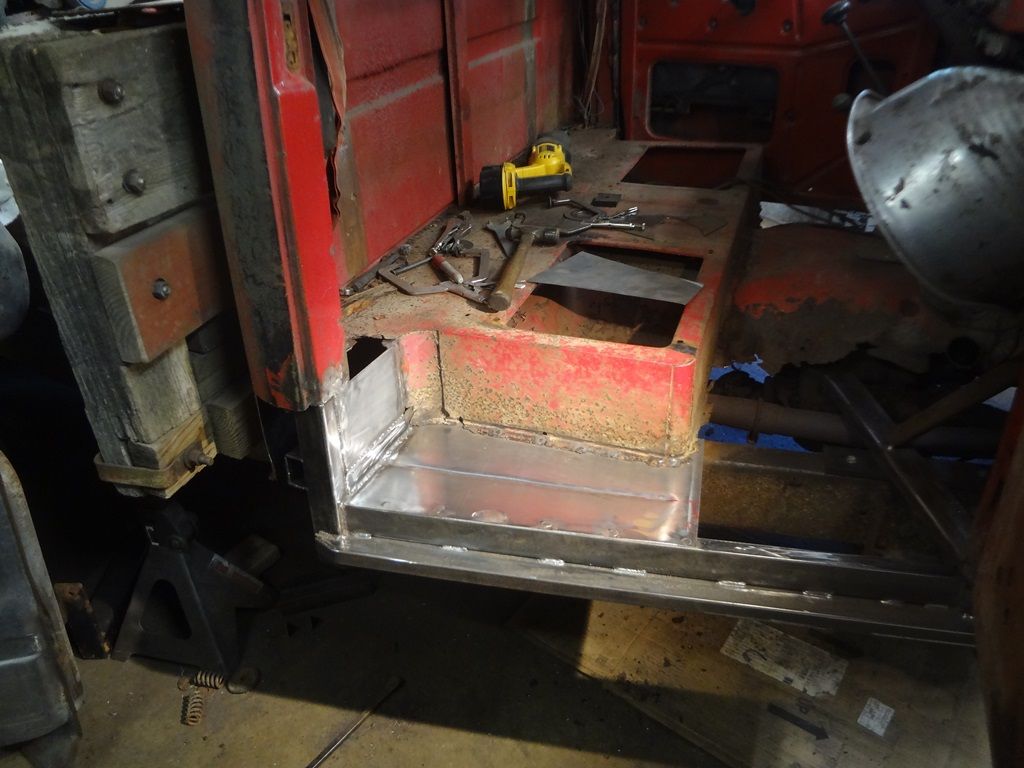
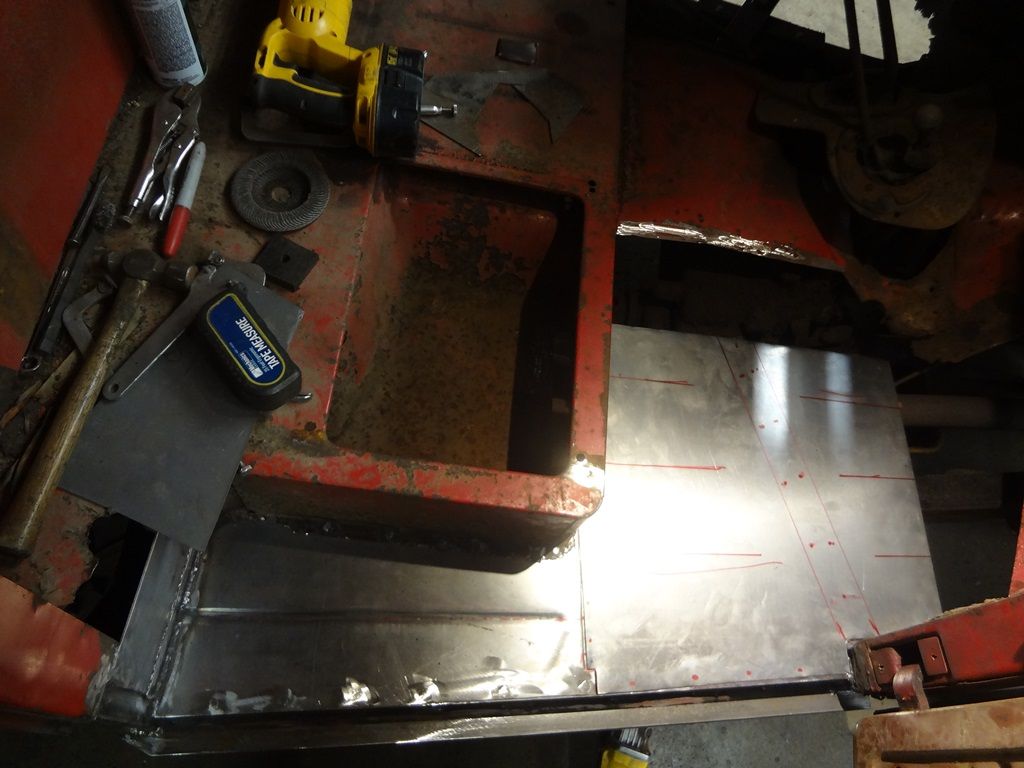
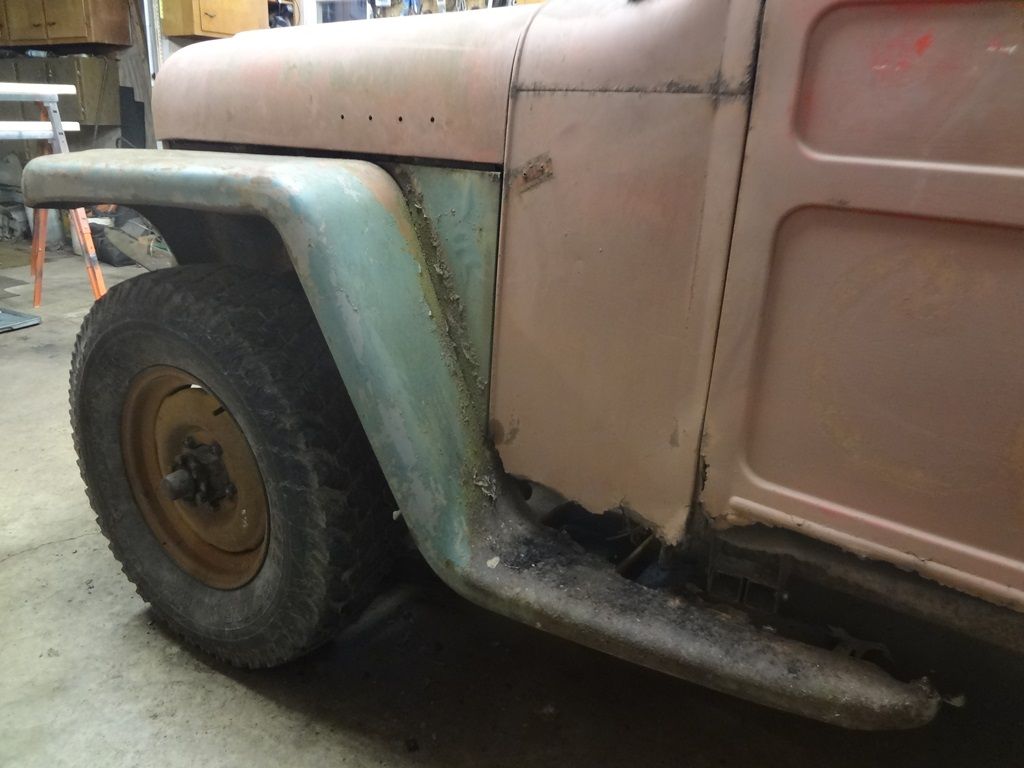
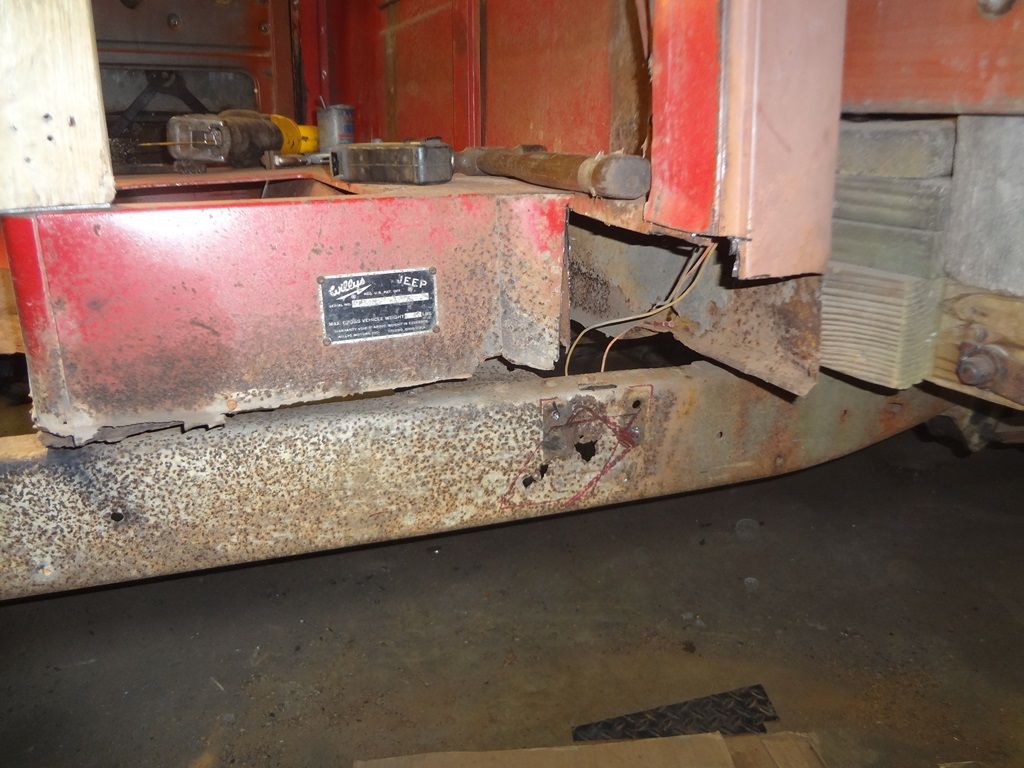
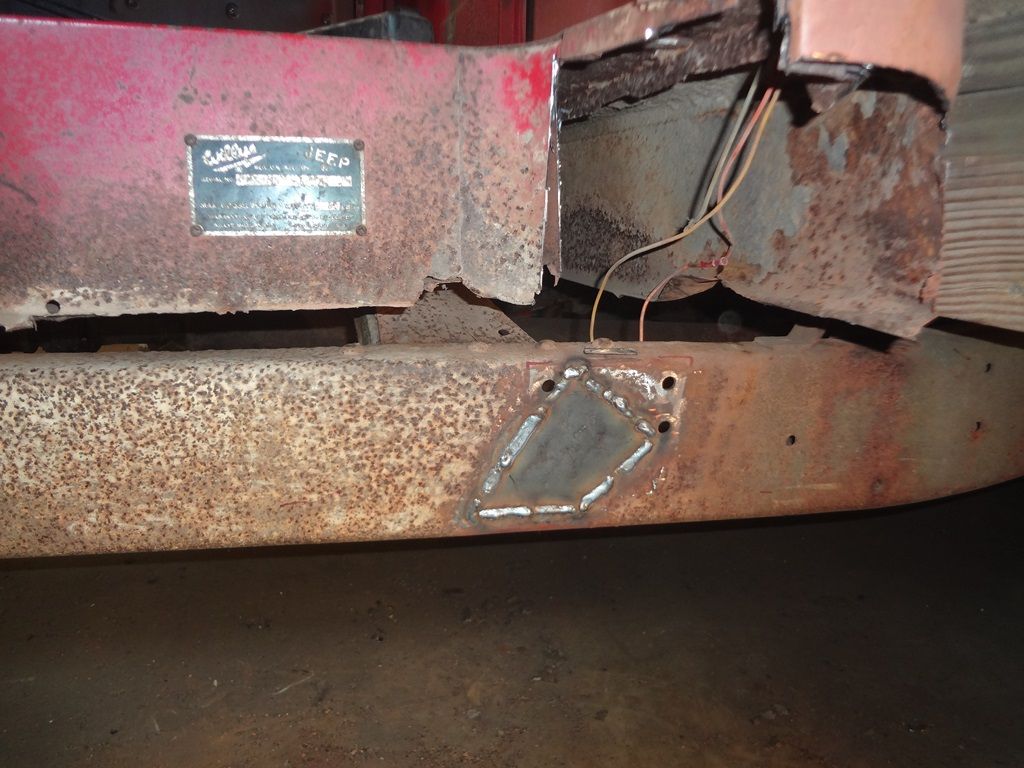
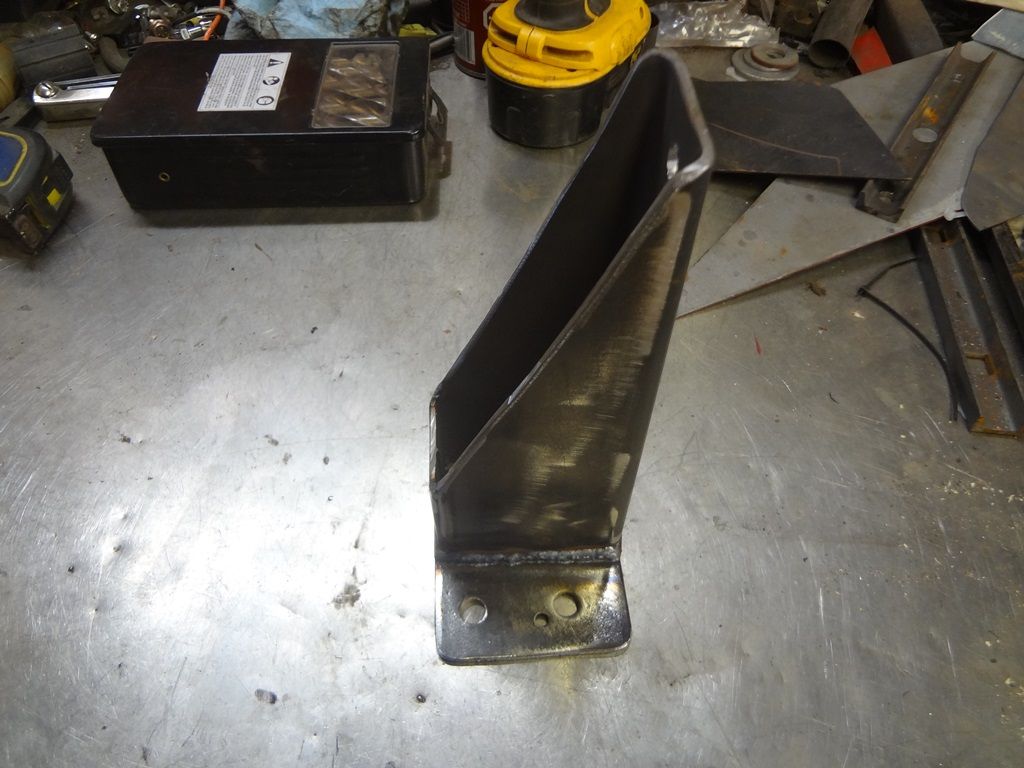
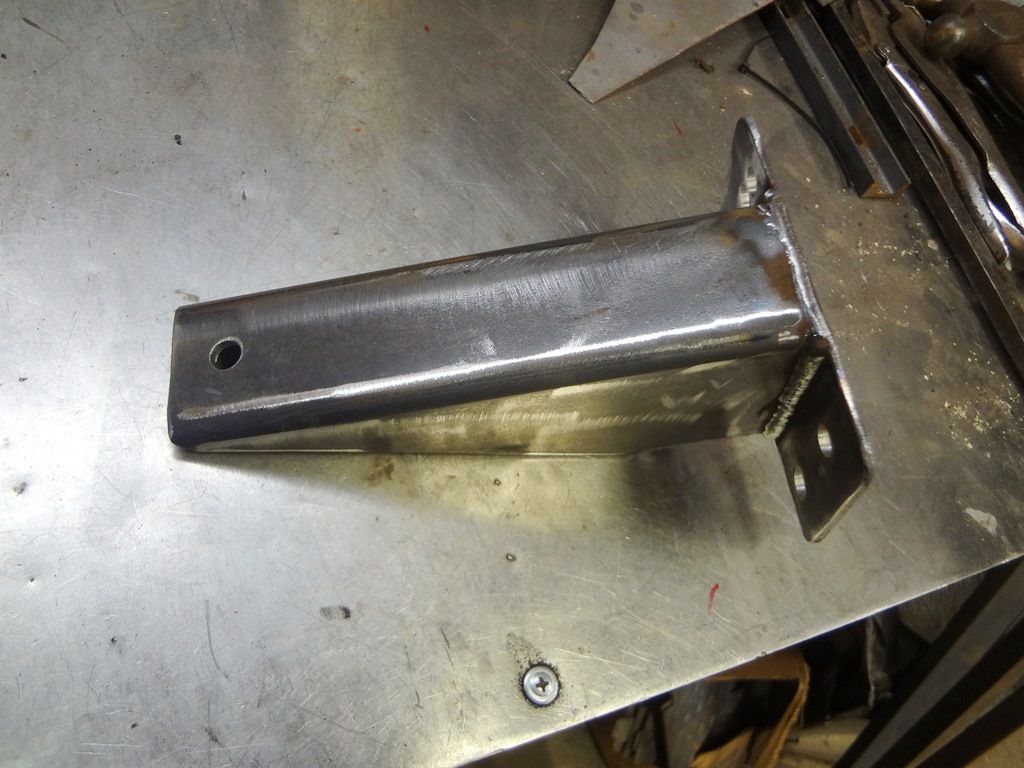
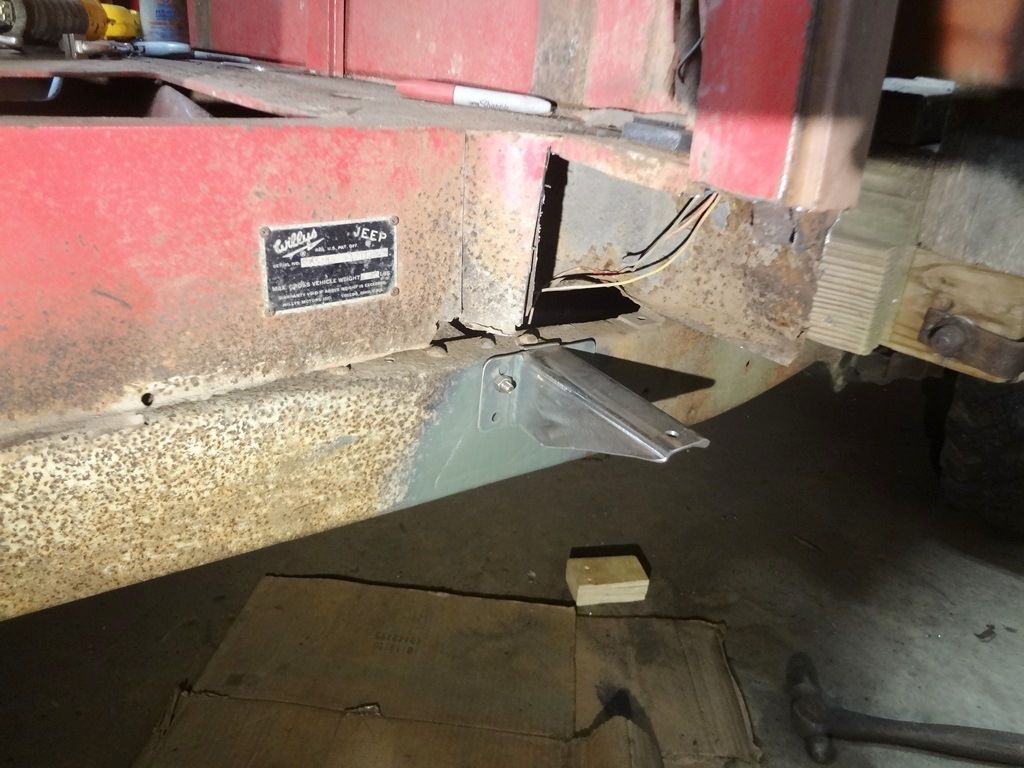
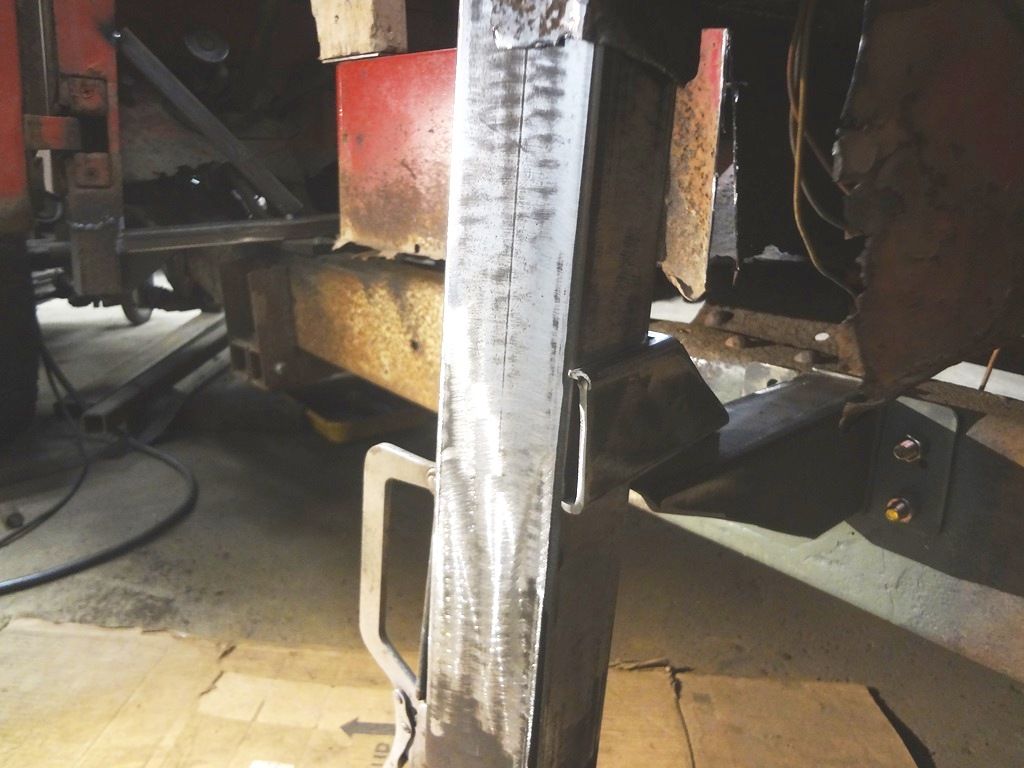
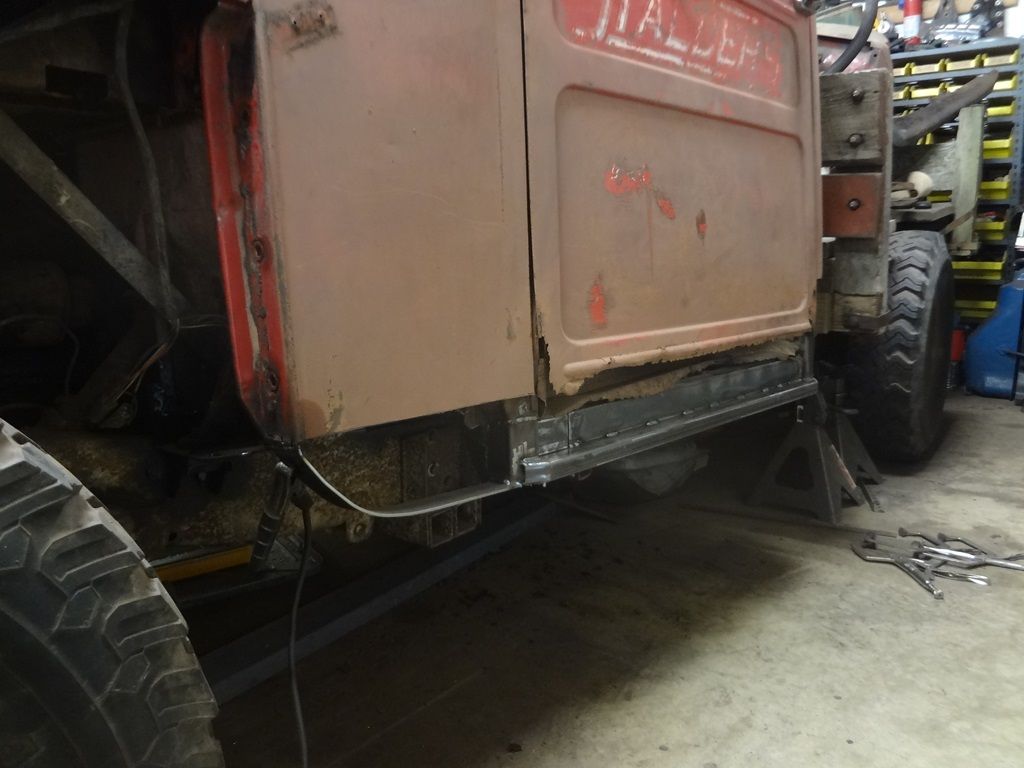
I am saving the passenger door because of the logo and have a better door to use. I pulled the fenders and am going to start at the front cab torque boxes.
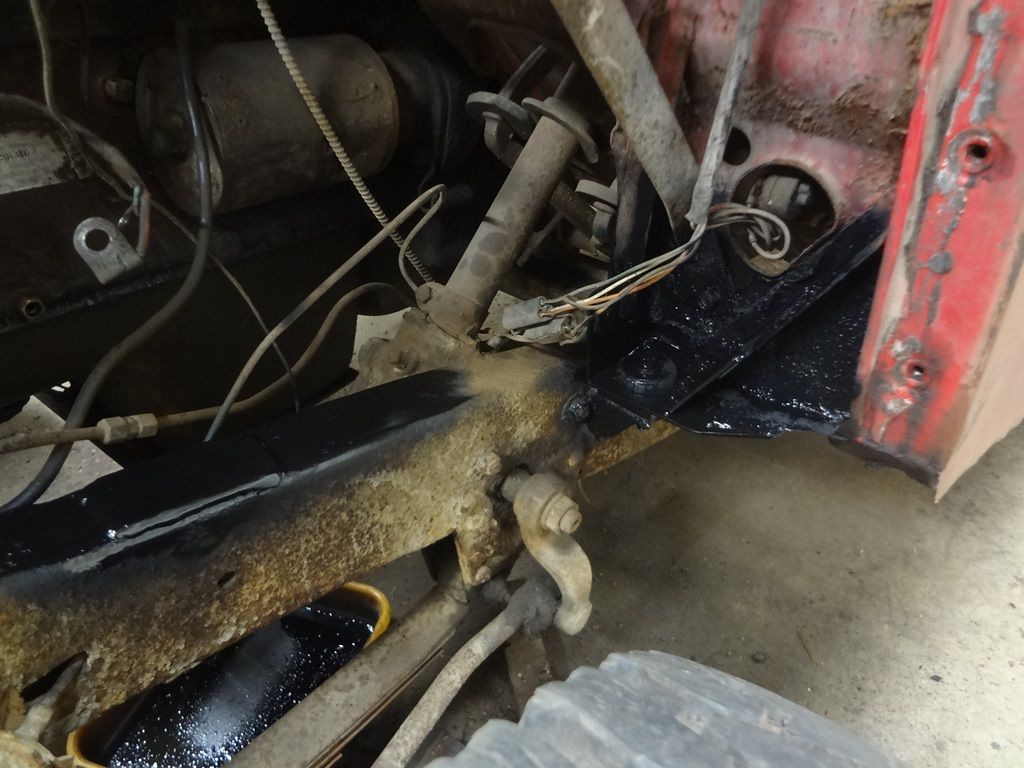
Jeep%20floor-08_zpsxsw7lyat.jpg


It's pretty rotten.

Jeep%20floor-10_zpssbe6uzef.jpg


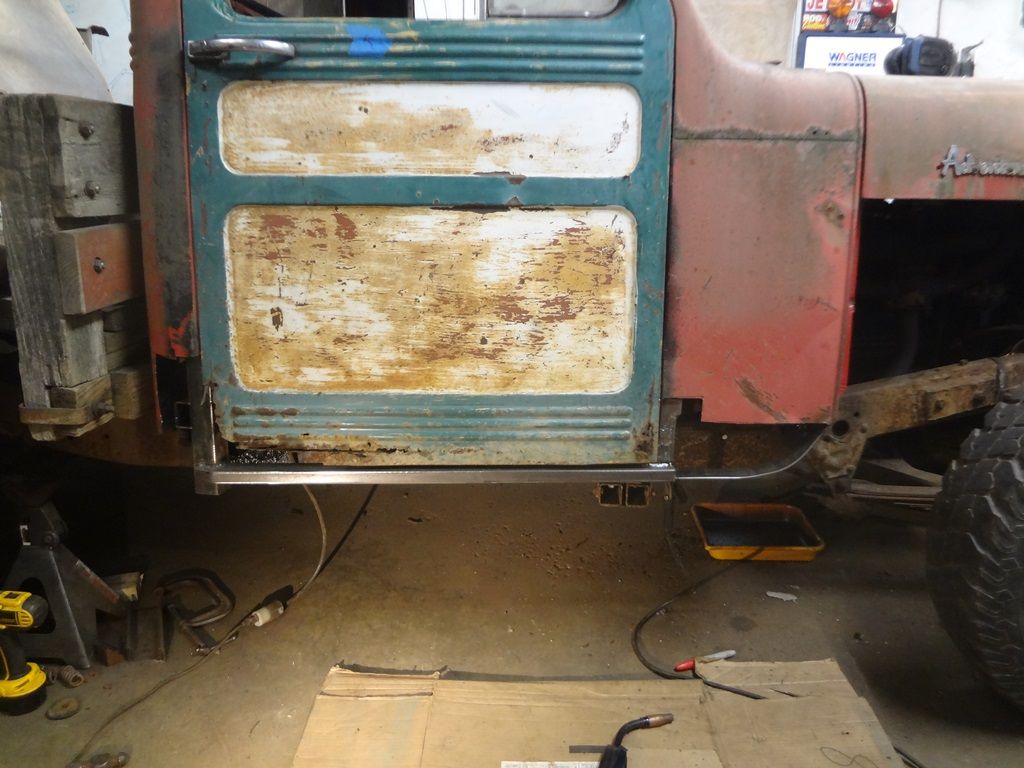
Fitting the new door. Check how far the cowl is sagged by looking at the door drop compared to the roof.

Jeep%20floor-11_zpsgggk6jal.jpg


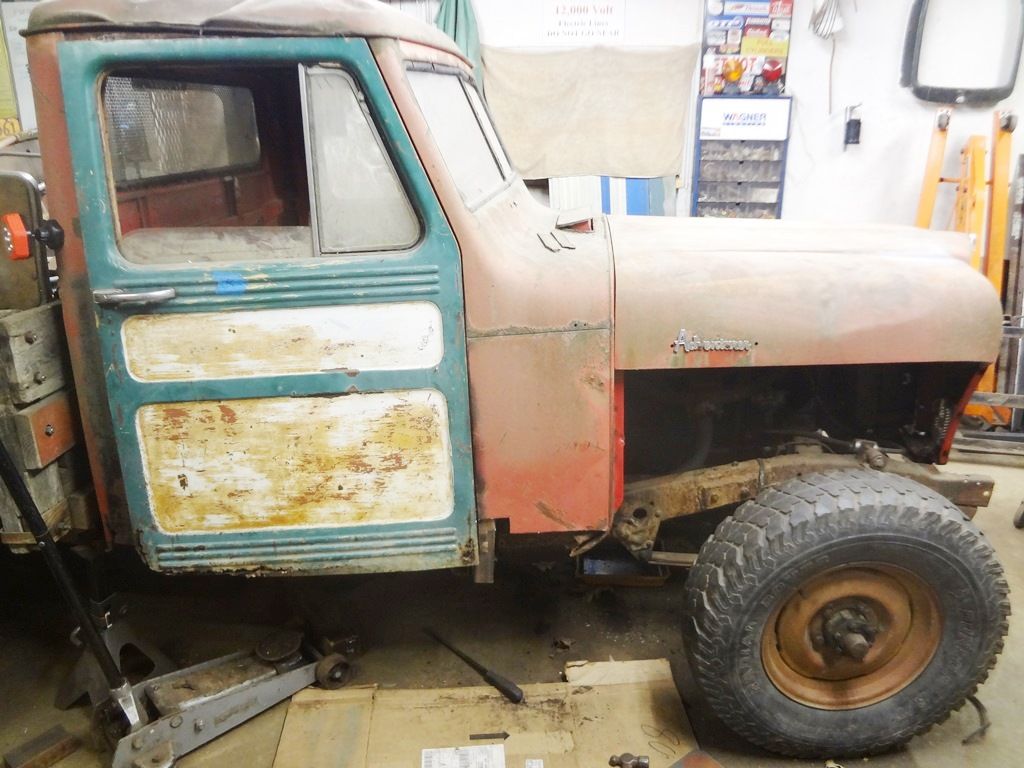
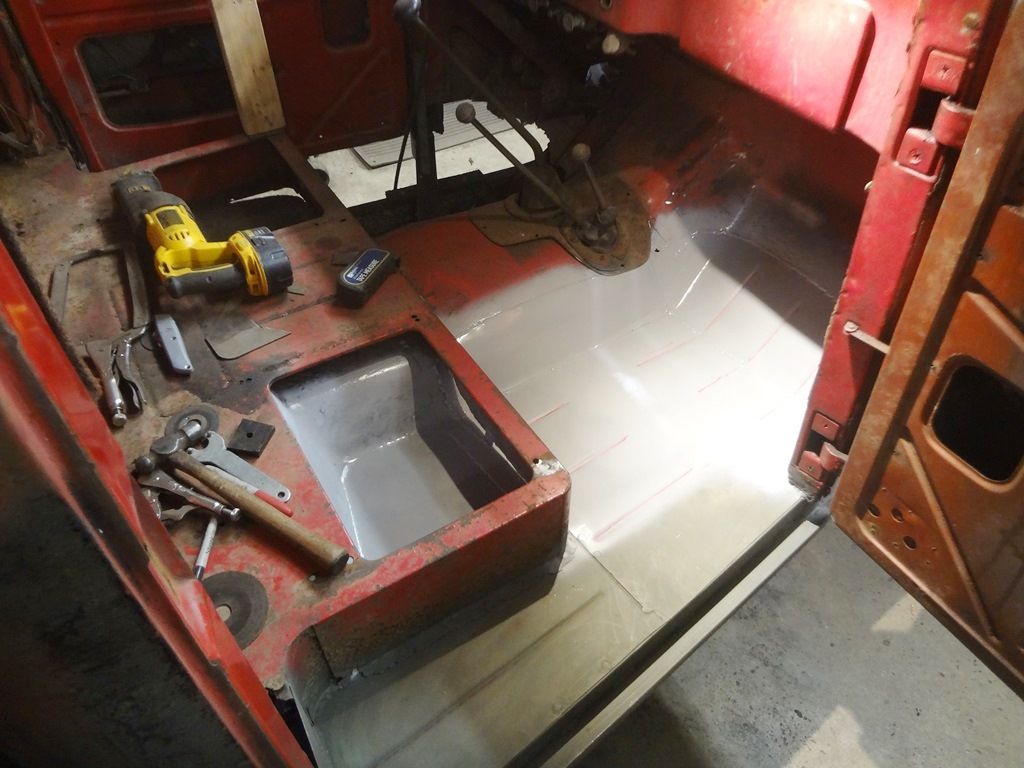
Cowl jacked back into shape.

Jeep%20floor-13_zpsrepztkiz.jpg
 
Welcome aboard. Very cool story and thanks for sharing. You weren't kidding about watching water through the floorboards. Yikes! With all the memories attached it's well worth saving. Good luck and keep us updated :)
 
Thanks for the pics,
Great ! story. :)
When I was a kid in South Mississippi in the early 60s I would ride with Grandpa Vic
up to the store and down to the " Lower place ".
One of the cars, I don't remember it as much as the old truck and tractor-but my mom says it was and old Buick with some kinda flame painted down the side-- had a hole in the passenger floor and I could watch the gravel go by
on the old road.
Funny how its stuff like that that makes a brand of sorts on your brain.
Totally cool that truck and especially that logo is.
Regards from Central Florida,
Haytsackneedle / Vic
 
Welcome From Colorado, Josh. What a great History your old Truck has! Yes, that passenger door's patina is a Keeper! I think that I'd hang that door in my Garage! Yeah, the old truck is badly rotted, but the upside is, it's fixable! Start a Build Log as I'm sure there will be a lot of Forum Members watching your Build Log! It's always a good thing to Save Another Old Willys Truck! Take Tons of Pictures of this project! Good Luck! Pivnic
 
Nice back story and will help motivate you through this big build back from the dead. :)
 
Welcome! Great story! Good luck on the project.
 
I'm not saying this cant be saved, it absolutely can..... But you might want to find a better cab, or better yet, make every single panel from scratch using what you have for measurements only. By the time you cut and replace the rot, you will have made every single piece of metal on the cab anyway. The difference would be a ton less cutting and welding!

In any case, good luck. Thats a cool looking truck.
 
Now that the cowl is aligned I was able to start on the front cab mounts. I made new feet from 1/8" plate stock.

Jeep%20floor-42_zpsxw38a6oi.jpg


The plates weld behind the stock mounts and repair the broken feet. Here is the right side.

Jeep%20floor-43_zpsuerobunf.jpg


And the left.

Jeep%20floor-44_zps6d4z7w1f.jpg


Next I built new floor supports from 1x2" rectangular tubing. These replicate the original channel that was under the floor.

I made a frame slider out of 1/2" HDPE plastic so floor support would have a smooth surface to rest on without squeaking.

Jeep%20floor-15_zpsd2dscpzg.jpg


The tubing at an angle is a temporary bracket.

Jeep%20floor-16_zpsqxktimv1.jpg


Here is the bottom of the driver's side.

Jeep%20floor-17_zps9leyolmk.jpg


Jeep%20floor-18_zpsbwm0dqut.jpg


With the cowl lined up I was able to move onto the rear cab mounts.

Jeep%20floor-19_zpssd6zllav.jpg


I reinforced the cab mount with a piece of box tubing and added a gusset to the frame.

Jeep%20floor-20_zpse4p4erbb.jpg


Jeep%20floor-21_zps4q5mcgw0.jpg


Here is the new lower cab corner brace and tab to bolt to the cab mount.

Jeep%20floor-22_zpsconlw5ek.jpg


With the corner brace installed I then started on the rocker. The lower piece is a section of 1x2" rectangular tubing.

Jeep%20floor-23_zps0p6ynch2.jpg


Checking the door gap.

Jeep%20floor-24_zpspijhex09.jpg


Rocker finished. It's very structural and will help protect the bottom of the body while in the woods.

Jeep%20floor-26_zpsb1qshdgp.jpg


Jeep%20floor-27_zpsrtpwpa9w.jpg
 
Last edited:
Next I began to work on the floor sheet metal. I'm making the floor out of 16 ga.

Jeep%20floor-29_zpspvxffdfn.jpg


Jeep%20floor-30_zpsp5ccj0gm.jpg


First piece welded in.

Jeep%20floor-31_zps9lj7pquo.jpg


Next was the main floor pan. Laying it out with some lines for bead rolling.

Jeep%20floor-32_zpsv8zfe1lj.jpg


Jeep%20floor-33_zpswnp8h14q.jpg


Getting ready to weld the pan in.

Jeep%20floor-34_zpsrakz8dsq.jpg


And welded in and cleaned up.

Jeep%20floor-35_zpsqh5yszfm.jpg
 
Last edited:
I found a better set of fenders in the junkyard and grabbed the grille for a wall hanger.

Jeep%20floor-36_zpszc8rwtzw.jpg


The fenders are a little rough, but far better than the originals. I'm not building a show vehicle and this truck will still be used in the woods and such so there fenders will be perfect.

Jeep%20floor-38_zpsqgbhfr2z.jpg


Jeep%20floor-40_zpso9afmrnc.jpg


You can see how much of the bottom of the cab is missing when you see where the fenders should be touching it!

Jeep%20floor-39_zpsrfnzhw21.jpg
 
Nice work! When are you coming to do mine? It wasn't as bad as yours. Should only take you five minutes. Lol
Keep up the good work.

Steve

Sent from my SM-G930V using Tapatalk
 
Continued on the passenger floor. Here is the toe board fitted up.

Jeep%20floor-45_zpsg4ulbudc.jpg


Tied the whole floor together with tunnel. Passenger side floor now complete.

Jeep%20floor-46_zpshahq0mjt.jpg


Jeep%20floor-47_zpsuznwlgev.jpg


I rolled up a cab corner and added a little bead roll detail to the bottom to stiffen it up.

Jeep%20floor-48_zpsij1in1ve.jpg


Front cab corner also finished and rocker finished off.

Jeep%20floor-49_zpscqu1im8b.jpg


Passenger side fab now complete. I am going to fix the door later. Onto the driver's side next!
 
Last edited:
Seriously. Wow.
The first pics made me think you're in way over your head.
But
It looks like you have the skill set needed to resurrect that Truck.
I love it when someone can bring an Old Willys back from the dead.
Keep up the good work.
 
Onto the driver's side! The rear cab mount was ripped right off the frame. The frame also had a hole in it.

Jeep%20floor-50_zpsmxlrolxc.jpg


Fixed the hole.

Jeep%20floor-51_zpske91tb0u.jpg


Fabbed up a new mount from some box tubing.

Jeep%20floor-52_zps9mhhzwth.jpg


Jeep%20floor-53_zps9aju51ua.jpg


Bolted the mount to the old rivet holes.

Jeep%20floor-54_zpsb2hussgi.jpg


Just like the passenger side I fabbed the bottom of the post from box tubing and made a new mount to attach to the frame mount.

Jeep%20floor-55_zpsxvohw6tt.jpg


Jeep%20floor-56_zpsfgg09coe.jpg


Starting on the rocker. The lower section is tied in first.

Jeep%20floor-57_zpsnnkg5ovx.jpg


With the door closed you can see how much was missing on the driver's side!

Jeep%20floor-58_zpsb7uzpuh0.jpg


I also spent some time and completely rehabbed the clutch linkage and z-bar. All the rods and z-bar holes were worn. First I welded and reground the rods to stock size. Then I welded up the egg shaped holes in the z-bar and filed them back round. unfortunately I forgot to take pictures, but the clutch pedal now has no slop in it's travel and works well.
 
Finally some time to work on the Jeep again. Here I am forming the floor to seat riser piece.

Jeep%20floor-59_zpszbelsrpc.jpg


Jeep%20floor-60_zpszoo4ysg2.jpg


And the piece welded in place.

Jeep%20floor-61_zpspwpvbf9n.jpg


Jeep%20floor-62_zpsusiru5q4.jpg


Rocker panel and front cab corner almost complete.

Jeep%20floor-63_zpswsmzfcbd.jpg


I went though some old family photos and was able to find some pictures from long ago with the Jeep in the back ground. Here I am at 9 months old on Halloween 1978. You can see the truck down in the autumn leaves to the right.

Jeep%201978_zpsgzpastgp.jpg


Here I am driving sometime around 1981. You can see that the door and cab were already pretty rough way back then. It looks like the tree hasn't fallen on the roof at this time. I don't remember exactly when that occurred.

Jeep%201981_zpsngv7n8e1.jpg
 
Back
Top